Alas this costume is complete! Unlike my other project (which I shall blog about later) this costume has been a joy to work on. Usually boring simple designs don’t keep me interested, I get tired of them very quickly and my work becomes sloppy and rushed. This happened when I was making Mizore and I was really worried it would happen again with Merida.
Luckily, that was not the case at all. I really enjoyed making this and I actually really like wearing it too! It’s comfy and easy to get on/off, plus it’s actually flattering – quite the rarity in my cosplay closet.
Anyway, On with the post! If you missed the previous post on this costume you should read it here.
There wasn’t a lot left to do on the dress. All it really needed were ruffles and a good hemming. The first of which proved to be a bit more time consuming then I would have liked.
I cut strips of chiffon, folded them in half, and top stitched the fold.

I used the tension method of gathering, which works really well on lightweight fabrics. All you have to do is set your tension as high as it’ll go, and set the stitch length to the longest length. Then you sew and enjoy the perfect ruffles.
Some of these got sewn onto little strips of wool which got hand sewed into the sleeves.

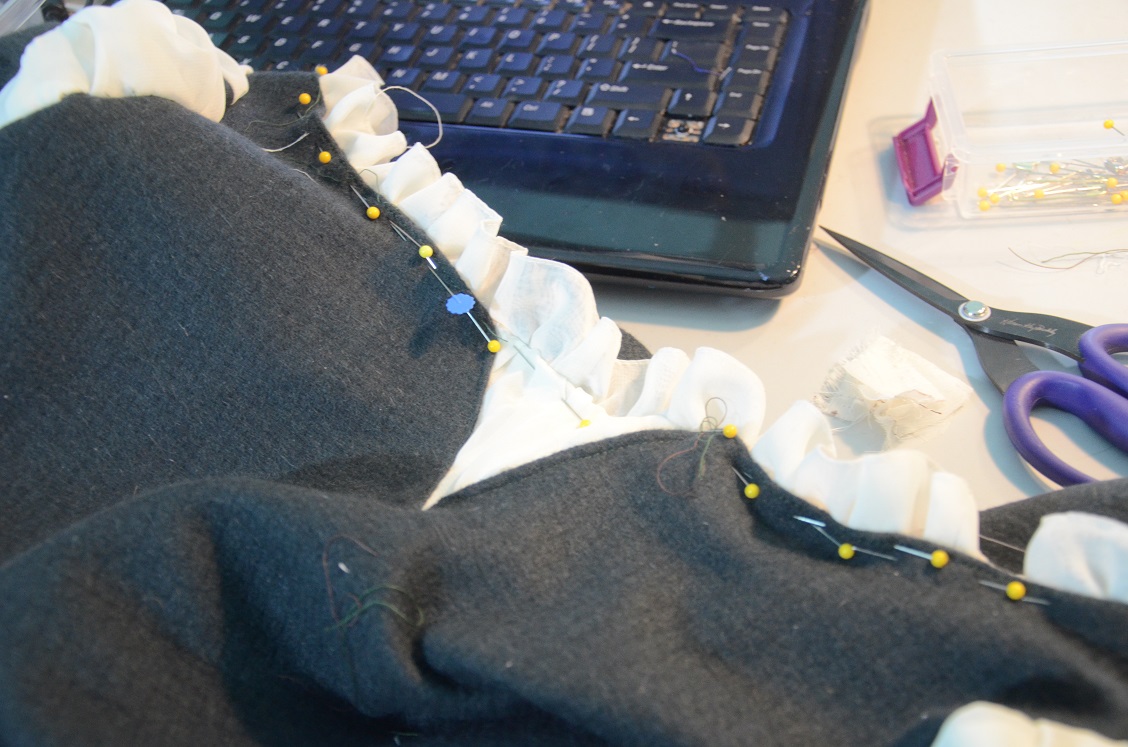
The others would later go onto the neckline – but first I had to cut the neckline! I did this by putting on the dress and drawing it out with dressmakers chalk. Then I measured out and cut the “V” I cut a rectangle of muslin which would fit beneath the V. Then that rectangle was covered in chiffon that had been gathered on each edge.
If that doesn’t make sense go back to post #1 – it’s the same method I used on the sleeve poofs!
That got pinned into place…

And sewn! I later cut off the edges.

Then ruffles were added to the neck. The bottoms of these were sealed with nailpolish to prevent fraying.
Once completed it looked like this!

When it came to the lacing I used some cream colored cording I had laying around, a VERY large needle and pliers. I measured out where each hole should be and worked the needle through each one. This was really annoyingly difficult and I would not recommend it – but I personally think it looks better then grommets so I guess it was worth it.

There we go.

Moving onto the cape! I thought this would be really easy, but I struggled with the pattern. Unlike most all cape patterns, I didn’t want mine to have a seam down the center of the hood. I wanted it to be three pieces.
I quickly learned these do not exist and are a pain in the ass to draft. Made more challenging because you have to account for a GIANT hairstyle that needs to fit in said cape.
But I did it!

The piece on the far left is my lining. The back seam has a french seam.

Which looked like this when put into place

The actually cape part is a half circleish sort of shape that was double hemmed on each side, the top was gathered by hand and sewn to the inside of the hood.

This cape also doubles as a dog bed so that’s pretty cool.

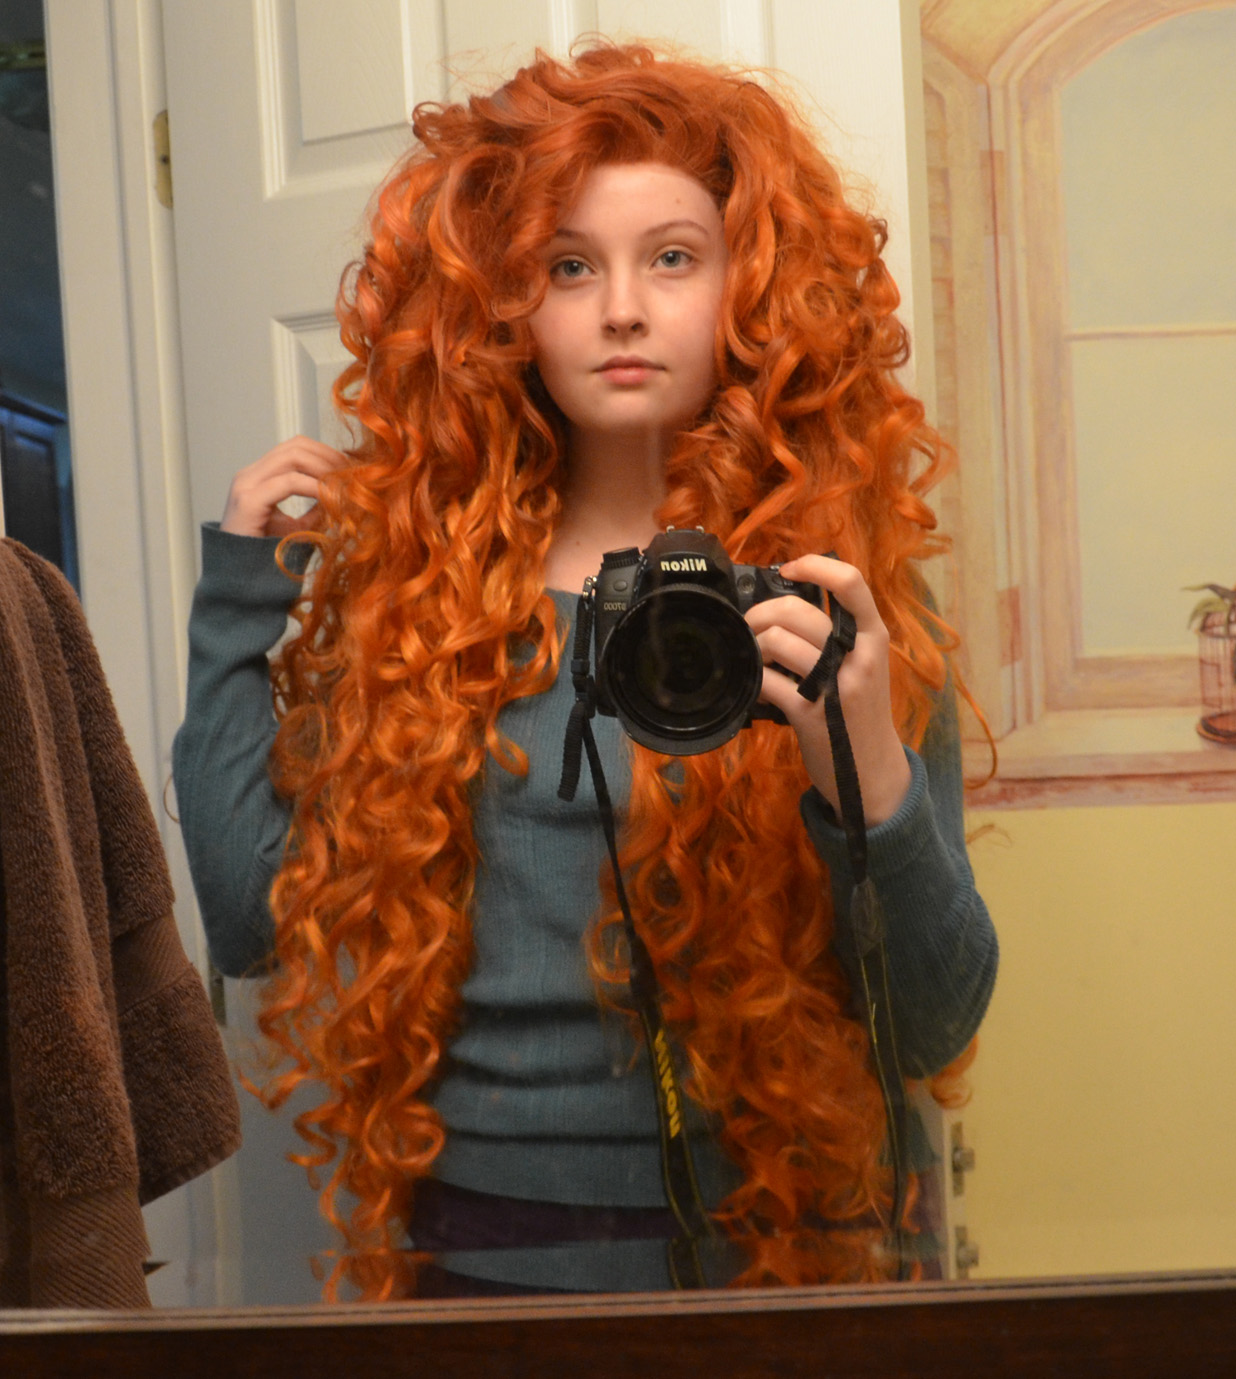
And in the end it looked like this! The hood is pretty floppy here because I don’t have a giant head of gingery locks like Merida.

Speaking of gingery locks…
This pile of hair arrived for me!

What you see there are four wigs.
This is the base wig – which I dyed to match the other wigs I used. And one of these, and two of these.
Those links will probably be dead in a few weeks so here are pictures. At the time I ordered these they were all on sale and I think in total I spent $65ish.

So the three long (100cm) wigs were turned inside out and seam ripped apart!

Each weft was sewn to another weft, making them twice as thick.

Then I laid them all out on a towel and used alcohol dye to make the roots and certain strands darker. I brushed the dye on with a large paint brush, and after a few days I washed each weft.
My entire bathroom floor was covered in hair.

The “base” wig has a lacefront which makes it look more natural. Sadly this wig did not come in orange, so it got dyed via the spray bottle method. Each strand was heat sealed before I rinsed it.

And then I started sewing the long fibers onto the lace front wig. SO MANY PINPRICKS. Dear got it was miserable, but you know what was worse? Curling it. My fingers still hurt. They still burn.
I honestly wish I had more photos of this process, but it’s tricky to photograph. The curling process especially since it requires both hands and has to be timed to the second (otherwise the wig melts, yeah, fun.). Also my hands were orange from the dye so it was a big mess trying to wash them! Plus in my bathroom lighting the wig photographed as a big orange blob.
Here we are maybe 1/2 done. With a lovely shot of my bathroom floor (wefts that still had to be sewn in.

And here we are two nights later! After another five hours of work (and a ‘Say yes to the dress’ marathon) it was almost complete!


And then the next night the bangs got styled and I could proudly say it was DONE! This beast took longer to make then the costume it’s self did. If I had to guess I would say it took 12-15 hours. Crazy.
Today I did the very first makeup test, which I actually filmed since people on tumblr were curious. The makeup is pretty boring and straightforward – I kept it natural since a lot of makeup goes against both Merida’s appearance and “spirit”.
Anyway – that can be watched below!
And here is the finished product. I’m quite pleased with everything, next time i’ll use more blush but that’s about it!

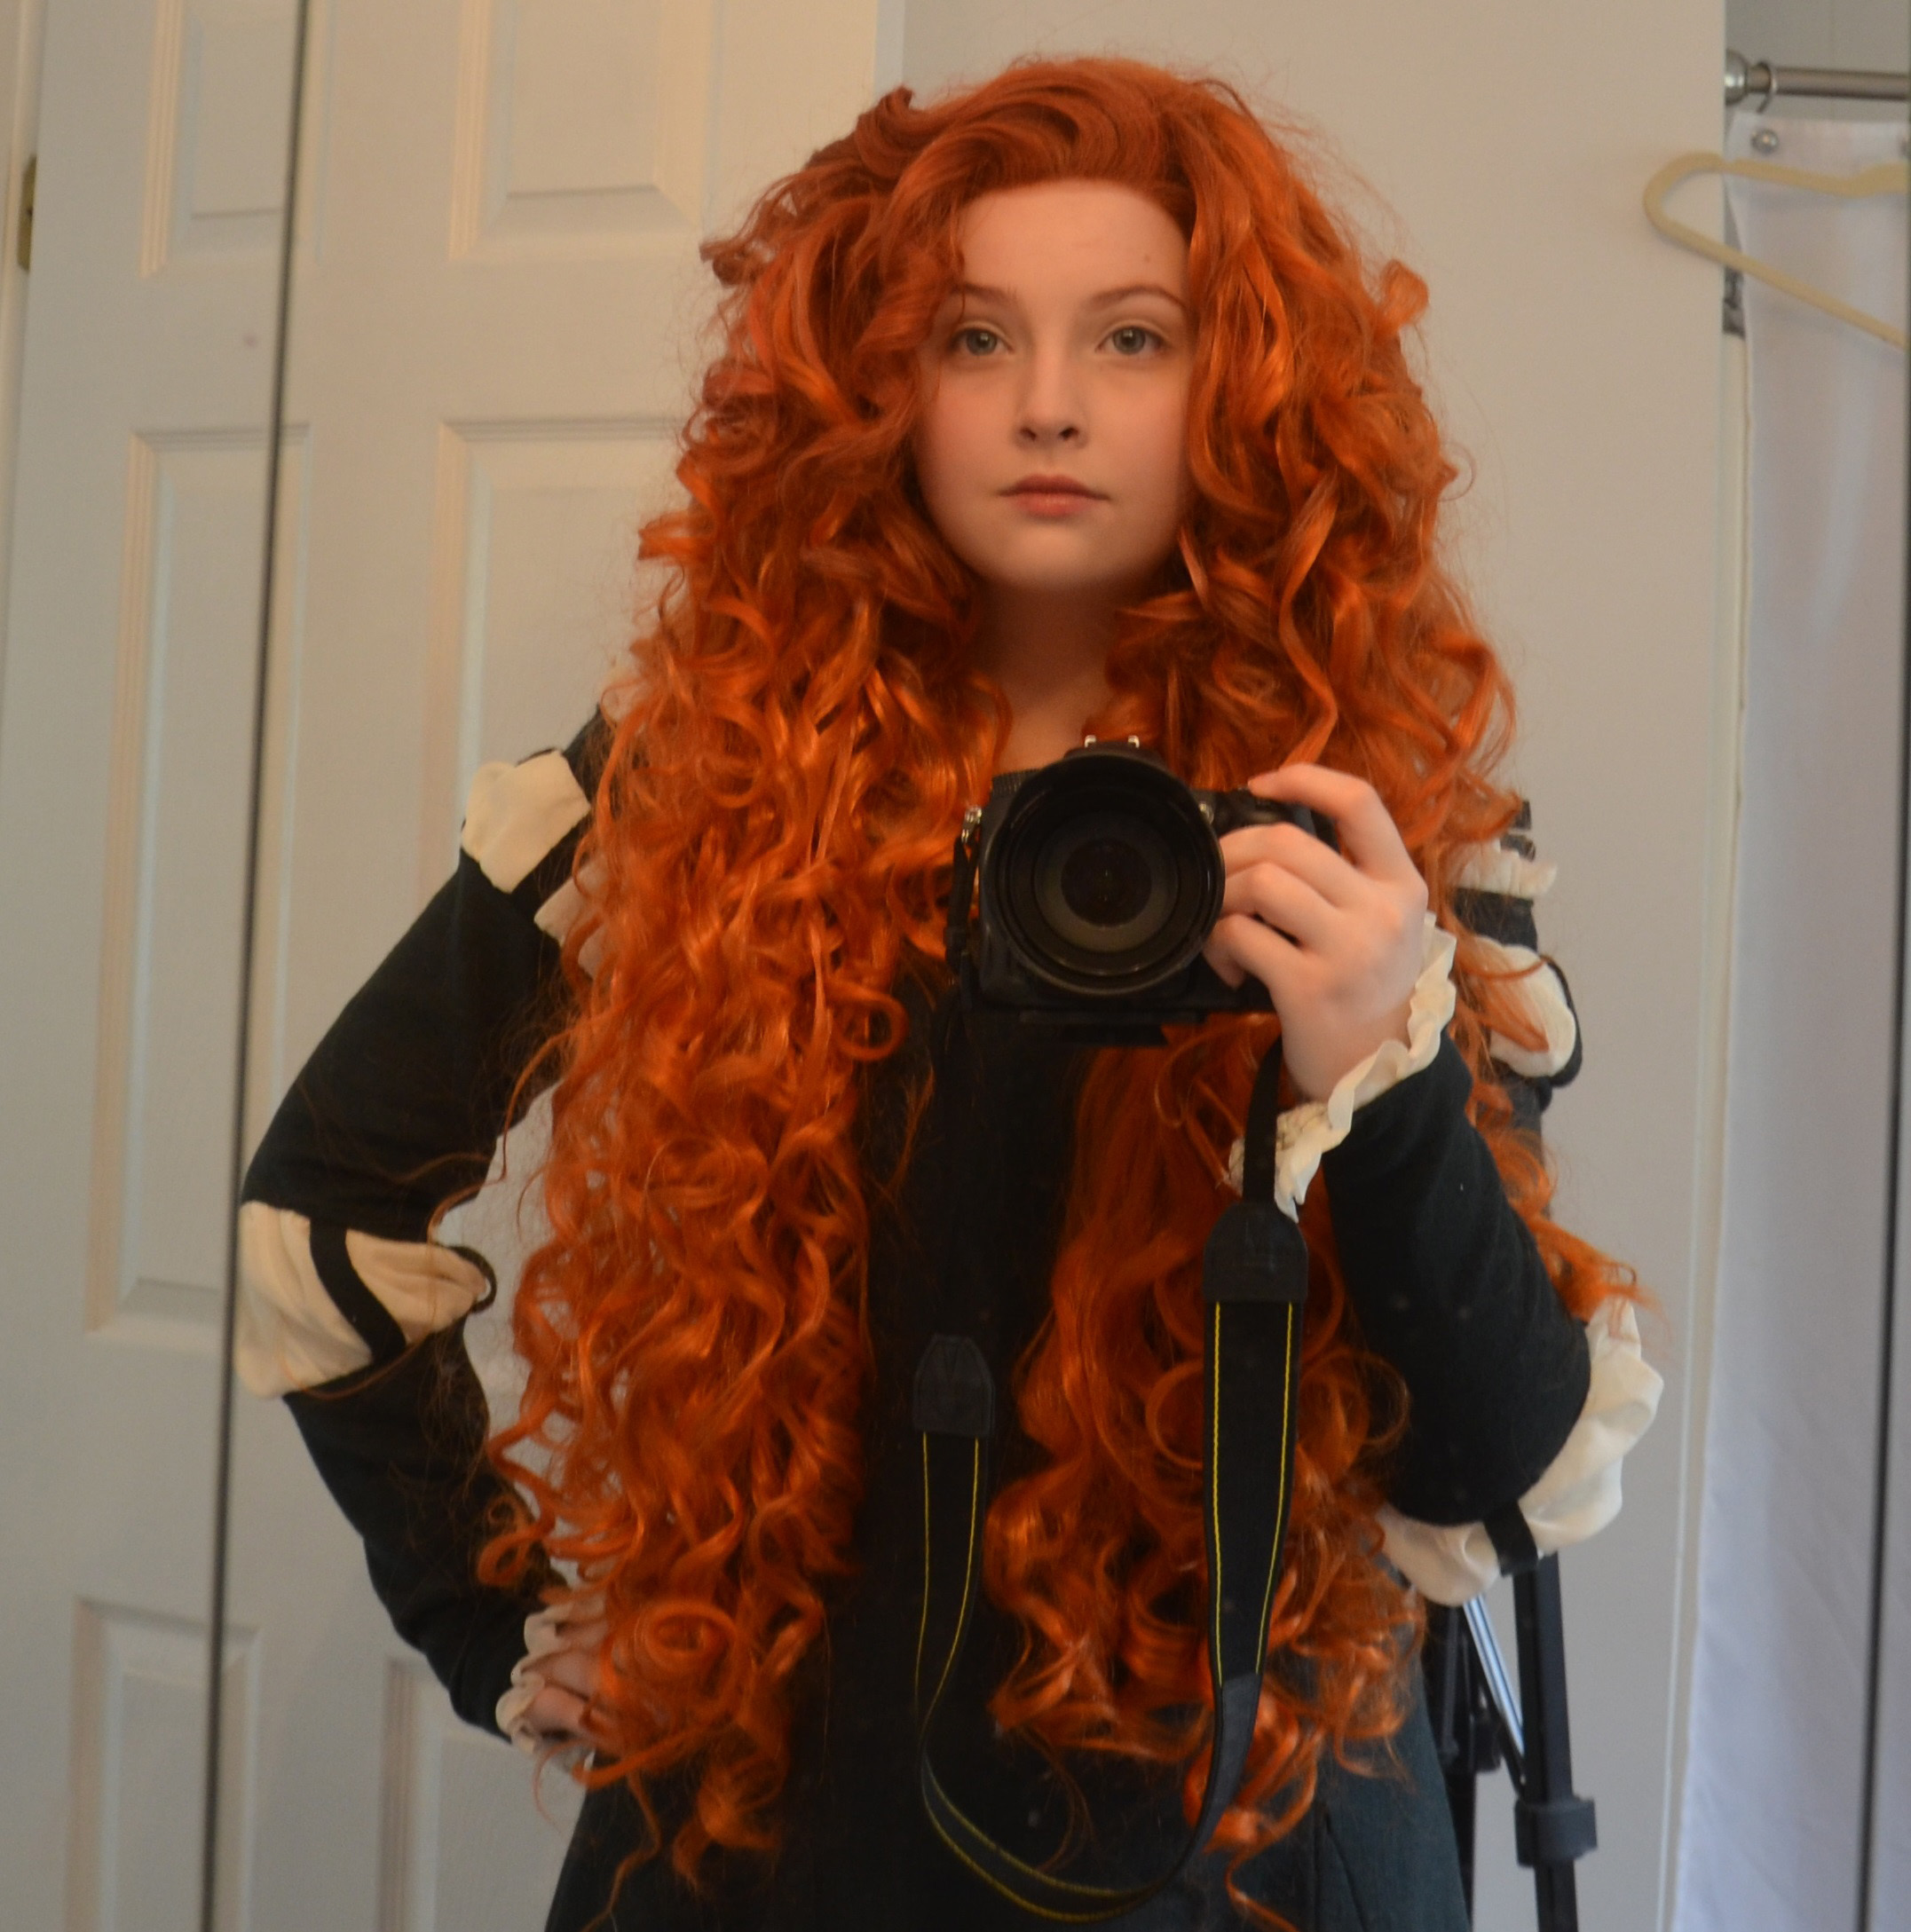
With the cape:

And of course, a photo of the finished dress. Hopefully I can get pictures of these together later on this week – I would love to have a shoot in the woods before I take this to animenorth and the wig get’s all messed up.

I do believe that is everything!
As always, thanks for reading!

You are ridiculously talented! this is gorgeous!
Is there no end to your extreme talents?!? I loved seeing both the dress and the hair come together. Beautiful!
I think my talents end when it comes to building props! That’s an area that I lack expertise in. Thank you, i’m glad you enjoyed it!
The wig is an impressive beastie, well worth all the work you put into it.
You are so unbelievably talented.
BEST MERIDA I’VE EVER SEEN, and most talented fifteen-year-old I’ve met. Girl, you have a bright future ahead of you.
Ahh thank you very much! I
You are beautiful and talented. The wig alone led me here from our regional cosplay group’s page.
This one is very nice, do you mind if I use your ideas? 🙂 ❤ I love your round face, oh, it's like you're made for this!
I post these things for a reason – so you guys can learn from my mistakes and success, feel free to use what you like! Thank you very much 🙂
Your wig is amazing and definetly you are Merida. Good job!!!
this is amazing! one of the best Merida cosplays I have seen
also ‘say yes to the dress’ is the best show ever hahah
How do you dye your wigs??????????????????????????? Help!!!
I know you didn’t detail the wig curling process that much, but what did you use exactly? 😮 Like curlers and a hairdryer?
Damn.. Wish I could get you to make my wig ^^
What dye did you use to dye the wigs the same color? Also what type of curler did you use and for how long?
Oh my gosh I can’t believe you’re only fifteen and already this accomplished! I can’t even imagine doing any of this. You’re the kind of person who scares me away from cosplaying with how great you are! Keep it up!
This is awesome, GREAT COSTUME and you look EXACTELY like her.
🙂 Love it
how long did you curl each piece of hair? i’m trying to make my own Merida Cosplay and i dont want to burn the wig. thanks
I was wondering if you wouldn’t mind going into some slight furthor detail with the wig process >< thinking of doing merida cosplay this year for Hal-Con~
Thank you for sharing the ‘how to’s’ for Merida’s costume. I have been making costumes for kids and grandkids for years. I have been asked to make a Merida dress so my little friend can wear it to Disney on Ice. Great ideas, you are very talented… Thanks again! I’ll be watching your blog for your next coplay project. I’m impressed!
this is completely and totally serious. if i asked you to make one for me, how much would it be????
Do you know roughly how much material you used? Both for the dress and the cape. Thank you, and your work is amazing!!
I purchased at least three yards of each, maybe 3.5 yds? I really wish I had gotten a bit more though, I couldn’t make the cape as long as I wanted and I barely had enough for the dress.
Thank you!
The wig process is amazing! I wish you had more details of how you sew it and paint it.
This is insane! I’m 16 and I want to try this cosplay but I’m so afraid it won’t come out as well as yours! Two questions I have on the wig process: I don’t understand how you sewed in the wefts and made it longer? I’m not familiar with wig making though, so I think it might just be my lack of knowledge in that area being why I don’t understand xD and also what wig dye did you use for adding the darker color and dying the entire base wig? Is there a certain brand you prefer?
Hi. I an thinking og maling my own wig and I was wondering if it is possible to use curlers instead og curling iron?
You are amazing ^ ^ Do you take Commissions? meaning if paid would you make cosplays for others.
This is so coool! You are great!!!
How did you curl the wig??
I saw this floating around on the internet but had no Idea that this was YOU! Agh you have such a perfect face for this- so beautiful! I honestly think that what made the cosplay look good in some cases (such as yours) and bad in others is THE HAIR! Its insainly hard and your was perfect! You are sooo talented!!!!!
you are beautifull!! I fell in love with this wig. Please, say me can you sell this wig?
oooooo fantastic Merida!!!
I WAS LOOKING FOR A WIG LIKE THIS DESPERATELY
AND THEN I FOUND YOU
AND I WAS LIKE YAY
But you made it
And I have no skills whatsoever to do that
Now I’m sad
*sobs quietly*
Now seriously, you deserve a medal. You are so very talented! Congratulations!
Is there any way you would be willing to make a wig to buy? There are no good Merida wigs anywhere for a reasonable price but yours is beautifully amazing!!!
If this happens, I am definitely getting one. Seriously, I’d pay as much as I could for this. It’s art and it’s BEAUTIFUL.
Definitely not! Sorry but I don’t think i’m capable of making another one. I think i’d either destroy the wig in rage, or it would destroy me and i’d lose my sanity.
Even if I did, the whole process took well over 20 hours so my price would be far higher then any Merida wigs on the market.
Sorry!
I’m really totally in love with this!!! I just need to know what tool you used to curl the wig. A wand? Curling Iron? What was the thickness of it and how long did you leave it on there? Thank you so much! You are amazing!!!!
I used a 3/4″ curling iron (with a clip); I talk a bit about curling wigs here: http://doxiequeen1.tumblr.com/post/57462999266/i-get-asked-a-lot-about-curling-wigs-since-i-sort
Thank you!
I love your wig! It’s absolutely fantastic. Quick question: have you had any problems with the curls relaxing? My big curly wigs always seem to relax after wearing them for a day. No matter how much hair spray I use!
now that i’ve had it for over a year (and it’s been on a wig head) some of the curls have fallen a lot, but it took a few months for that to happen.
In general I don’t have an issue with it, the wigs are plastic, and I curl them with heat, so you’re basically bending the plastic. They should WANT to stay curled, unlike human hair.
That stinks that you run into that problem!
I am really interested in the patterns that you used to make the dress, would you be able to email them to me? Thank you so much if you could!
Hi! Everything was beatiful, I just want to know How did you curl it? Because I’m making that costume for my daugther, thank you!
The hair. I can’t get over that you dyed and sewed that beautiful wig! Lovely. Great job!
Awesome! The best overall look I’ve ever seen. Simply amazing…. love the dress and the wig …omg ))
Reblogged this on Ninjadeia's Blog.
This cosplay is so real but can you make
a Merida makeup vedio on youtube?
Hi, Angela, wow, that wig looks just like the movie, this is an amazing feat! I am currently making my own Merida cosplay, and I was hoping you could tell me what type of ink and the general colors you used to strand-dye the wigs? It would be greatly appreciated.
Holy cow! I love the entire costume, but the wig must’ve been a pain. It is AMAZING though. All of you’re hard work definitely paid off. I just want to play with the curls! So much volume.
Hi, so i’m up to putting the ruffles around the neck, however mine are extremely floppy. Yours is not, i don’t know what im doing different. I am using a double folded chiffon like you and its looks completely different from yours, did you put a stiffer fabric underneath???? i know its been years since you did this costume but if you could try and remember i would be extremely grateful
awesome job on the wig
I love this dress ! you can send the schnittmuster me ? by email or by post ? Of course I would pay for all costs !
excuse the writing or grammar mistakes, I am from Germany 🙂
Hi, I absolutely loved your dress, but if anyone else sees this comment, I know a wig shop selling a wig based off of meridas hair called Merida. Just if you want a slightly cheaper/easier alternative 🙂