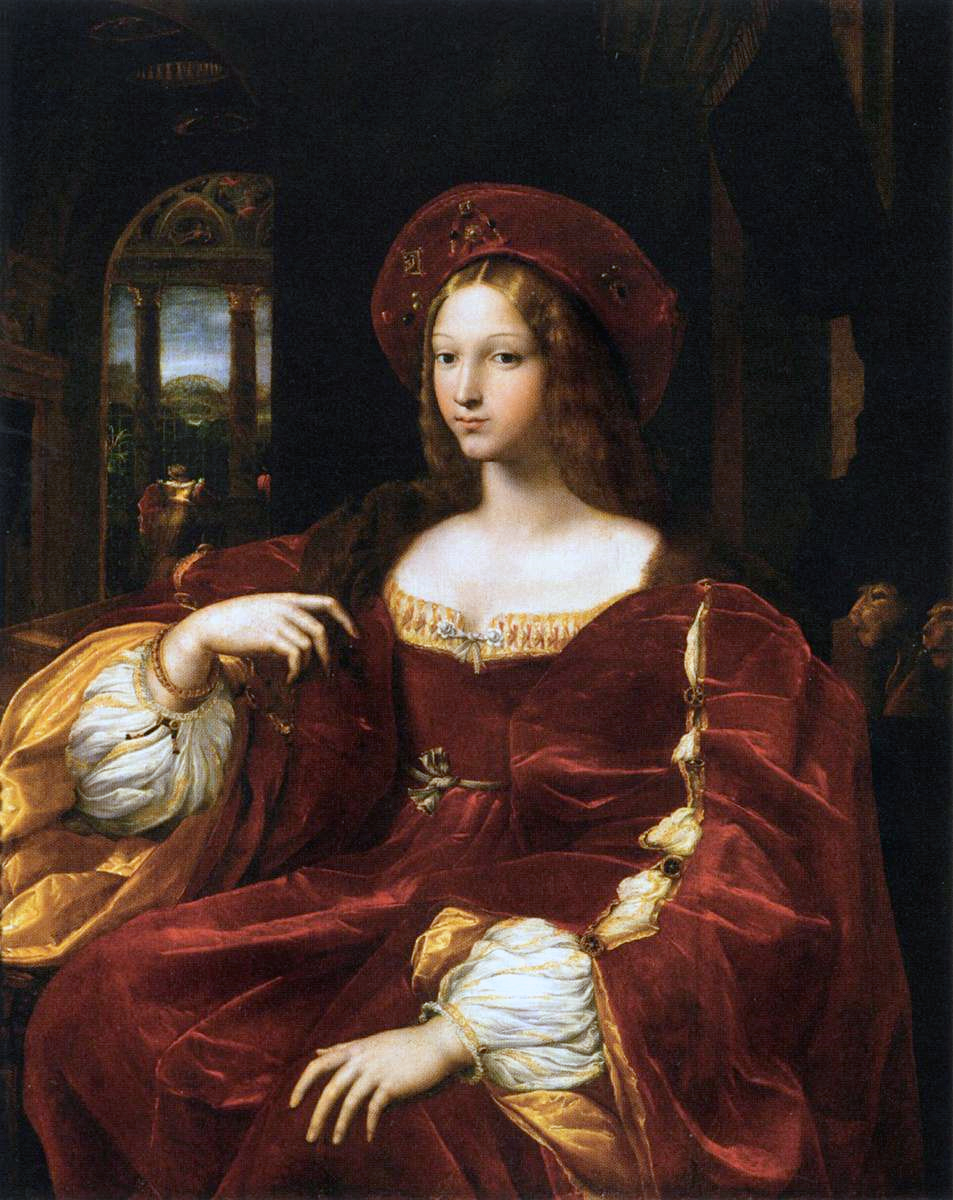
A few things I would like to state before moving forward with this post: I have searched all over and keep getting conflicting information about this painting. What I do know for certain is that it was painted by Raphael and Gulio Romano in 1518. From what I can make out the painting was originally titled as Joanna of Aragon or Je’anne de Aragon, which is still the most frequently used title in English.
Italian and French sites state the painting is of Doña Isabel de Requesens, wife of Ramón de Cardona and the official title seems to be “Portrait of Isabella Requesens, Vice-Queen of Naples” (I know citing wikipedia isn’t the most professional way of doing things, but it has more information then any other site i’ve come across).
I’m still not entirely sure which is correct, if you have more information i’ll happily change the title!
…
I also want to mention that I will be changing a few things. My fabric colors were based off of this version of the painting, a restored “high key” version. My gold and reds are much brighter and lighter the shades in the original, but at the same time i’ve chosen an aged off white linen for the chemise, simply to avoid the “candy cane effect” of pairing white with bright red.
Speaking of the chemise – I have chosen to remove a few details to make the garment more versatile with other projects. There may be other minor changes as well. I want to accurately bring this painting to life but I really don’t want to end up with a garment I dislike, so it will be a delicate balance!
Now that all that has all been said!
…
I discovered this painting back in December when I was browsing art.com and fell in love. It’s from my favorite time period, it’s red, it has super huge sleeves and a hat. It also requires a large amount of embroidery, which made the project easier to justify (even though it kind of looks a lot like things I’ve made in the past).
If you are unfamiliar with the painting, this is it.
…
This first post is going to be about making the dress, then later on i’ll post about the chemise. This was an odd project since the chemise collar needed to be made before I could create the dress, but the dress needed to be finished before the chemise was made.
The collar was key in drafting this garment, since it provided the basic neckline shape.
I used cotton as usual to drape my pattern, this was slightly tricky since I wanted a three piece pattern, but with a lot of stretching and pinning I managed. I didn’t trim away the excess fabric since I was terrified of cutting the collar by mistake.


When it was removed from the dress form, it looked like this.

I turned that into a paper pattern, which had to be altered a bit because it was large in the bust.

I cut my pattern out from velvet and lining material, and marked out all the boning channels.


Then I began folding strips of velvet and pinning them in place to serve as boning channels. Looking back on it I should have used a canvas or twill to support the boning, but my priority at this point was keeping the garment really lightweight.


Then they all got sewn down and boning was inserted.
These probably won’t be practical long term but oh my gosh this garment is so comfy because you feel the fluffy velvet instead of the bones again your skin.
 I set this aside for a bit and began work on the outer bodice. After the shoulder seams were sewn together my next step was making and attaching piping.
I wanted the gold on this costume to be a really specific shade, in the 16th century there wasn’t really gold fabric (aside from brocades or embroidery). It was either pale yellow or almost orange, in this case it looks like a deep mustard color which I wasn’t fond of at all. So I opted for a pale yellow.
I used a layer of my lining fabric and organza to get this effect. I also pre-wrapped my cord in flannel to avoid the rope texture showing through.

After the piping was made I very carefully stitched around the bodice neckline to create a finished edge I repeated this process on the bodice hem and arm holes as well.

Then the piping was pinned in place and sewed on by hand.


The next step was pinning in the lining. This went really, really badly. It was too big, it had stretched, it was too long…it was just a mess. I finally got it pinned so it fit but the end result looked horrible. I ended up just going with it, but i’m really unhappy with how the interior of this costume looks.

After that was done I embroidered eyelets in and tried it on for the first time! It was at this point I realized where my mock up had a fair amount of stretch, velvet does not. It had nearly four inches of skin showing in the back!

I ended up adding a “modesty panel” in the back, but it was more like an extra panel since the skirt was sewed on to the panel as well.

Once those were added I tried it on again and everything was good. It’s not as pretty as I would have liked it to be, and the interior is a bit of a mess. But i’m really happy with how the outside looks, so I can’t complain too much!
Thanks for reading!
Related posts: Part One, Part Two, Part Three, Part Four, Part Five.
