The making of a set of tudor undergarments continues! My first post in this series talked about making a pair of bodies and can be read here. This time i’ll be delving into the process of making a spanish farthingale. This project was one that required a lot of fiddling and several moments where I nearly gave up before making peace with it. Somehow I ended up being happy with the end result, even though it’s kind of an ugly beast.
…
There are two main types of farthingales, the most famous are French, or Great farthingales which look like big wheels. Spanish Farthingales came a little earlier, and look a lot less silly. They are a specifically shaped hoop skirt that resembles a cone with a flat front, which is what I need for my tudor ensemble.
I own a book (“The Tudor Tailor”) which a spanish farthingale pattern in it – this seems to be the go-to for a lot of historical seamstresses but the end result doesn’t have the exaggerated silhouette that I’ve seen in so many paintings. So I decided to not use that pattern, and instead I followed the instructions posted here.
The pattern featured in that tutorial was made for someone ten inches shorter for me with a much smaller frame. I wanted mine to be proportional so I made my panels a bit wider. Here are some doodles I made before starting – I didn’t end up following them all, but I found drawing it out was easier than frequently referencing the tutorial.

I decided to use polyester taffeta for this project, with cotton sateen boning channels. I wouldn’t recommend either of these fabrics for a farthingale, they did work but the end result isn’t the prettiest or most practical. Cotton or linen would be MUCH better with twill tape as boning channels.
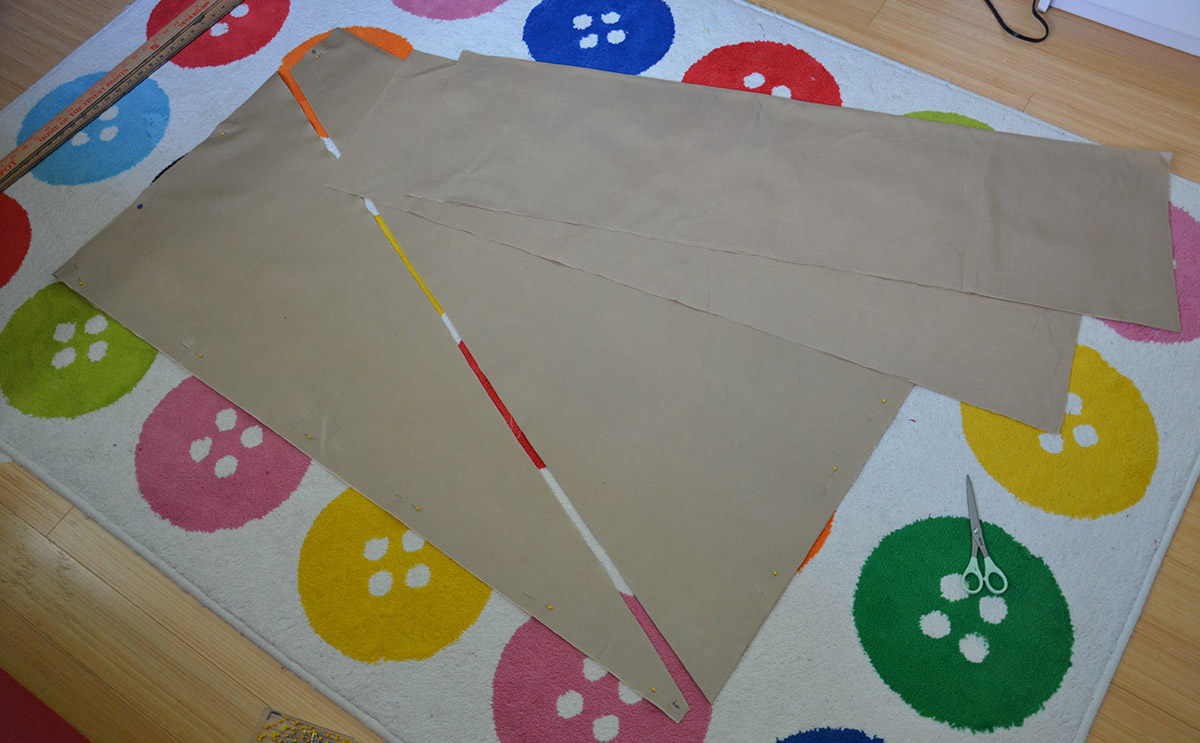
First I cut two pieces of fabric that were twenty six inches wide and ninety four inches long.

One piece was immediately cut in half to make up two twenty six by forty seven inch pieces. These will be used to create the gored panels later on. The remaining piece of fabric got folded in half and will eventually be used for the front and back panels.
 The folded piece of material also got cut in half. Instead of being precise rectangles they have slightly rounded edges to create a smoother hem.
The two twenty six by forty seven inch pieces got cut on a diagonal, one being slightly larger than the other. This is all covered in the tutorial I linked at the start!
I assembled it like the tutorial said – I did goof up and ended up sewing the back gored panels from bottom to top, so I had to trim a few inches from the top instead of at the hem. This means my hem will be a little larger than it should be, but I’m okay with that since I wanted a larger than average bottom hoop.


Construction was actually surprisingly easy – lots of straight half inch seams. I made things a little harder for myself by making every seam a french seam, but I don’t regret it because polyester taffeta frays SO MUCH, it needed to be contained.
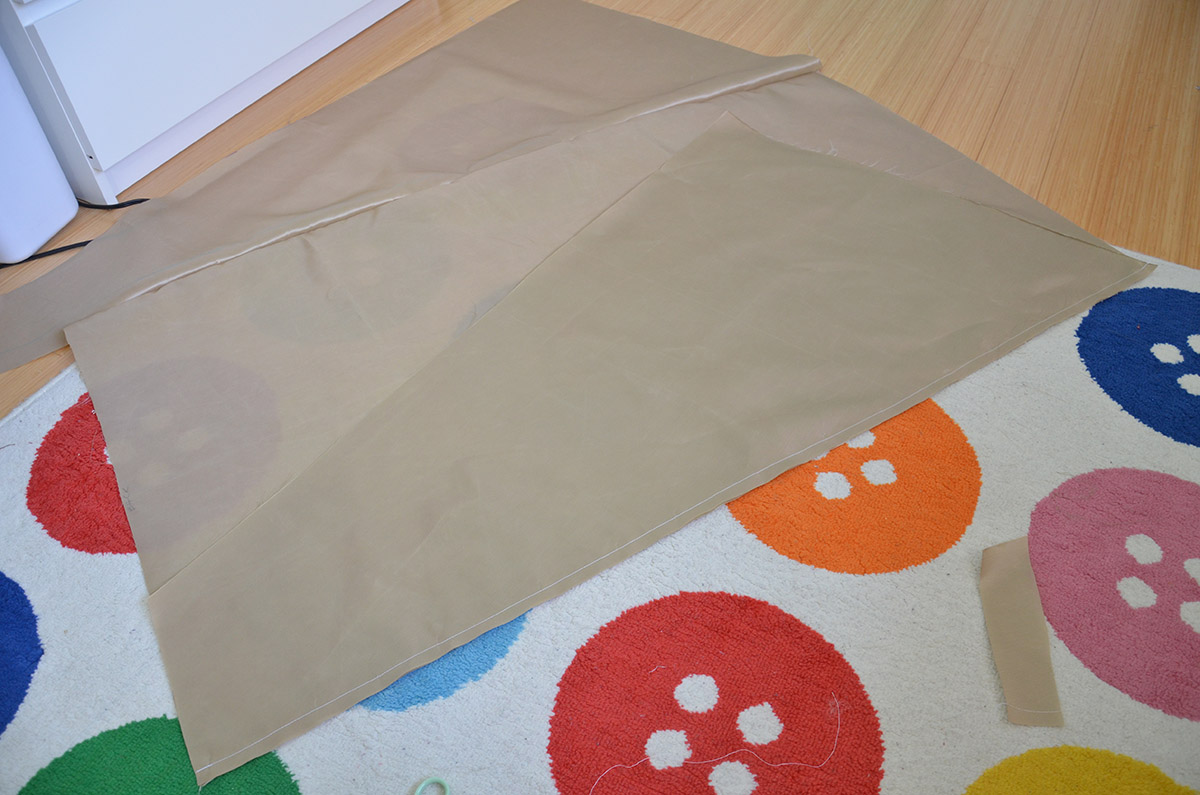
I got the front and back completely assembled before I ran into my first problem – and it’s a doozy. Because I made the pattern bigger the diagonal seams were much longer than they should be. For the side seams you have to attach a diagonal cut piece of fabric to a forty seven inch piece of fabric.
Which would be fine, but my diagonal piece of fabric was fifty three inches long, a six inch difference!

I had to lop six inches off my front panel. If I had been smart I would have added a six inch panel to the back and called it done, but that didn’t occur to me. Instead I cut off six inches from the front panel and big shock – my farthingale ended up six inches too short. Damn.
I continued with construction anyway, I sort of just hoped it would work itself out. I mean it could totally grow overnight! Or I could shrink! Miracles do happen!
After assembly was done you could kind of see the shape – I ended up trimming the hem to be smoother shortly after taking this photo.

I turned the hem up a half inch.
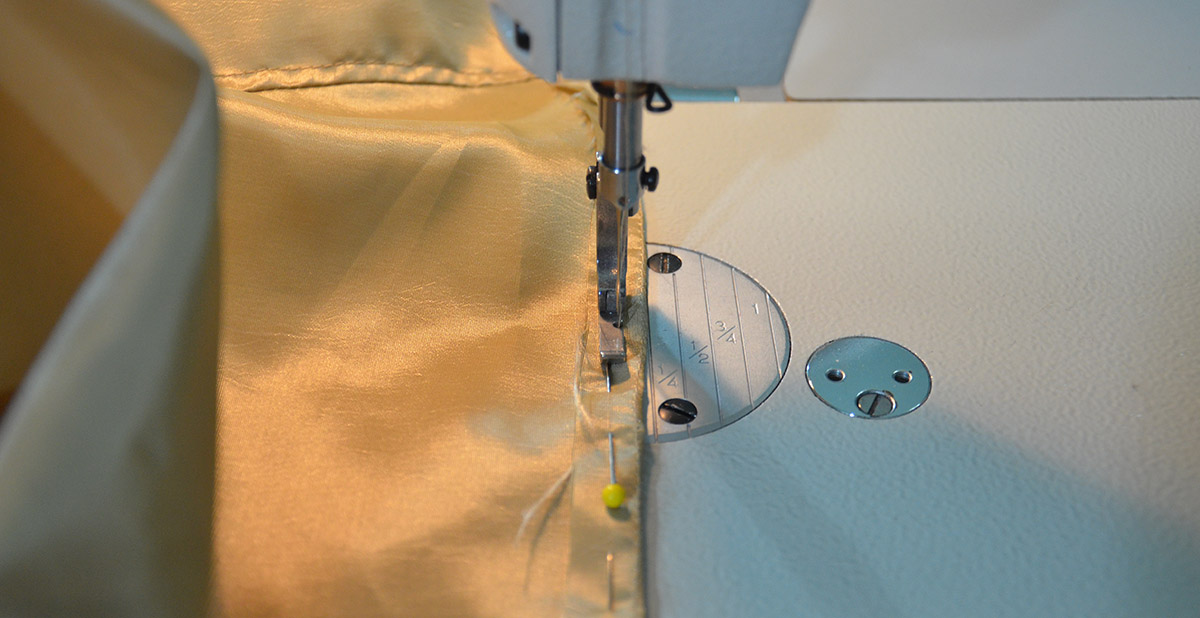
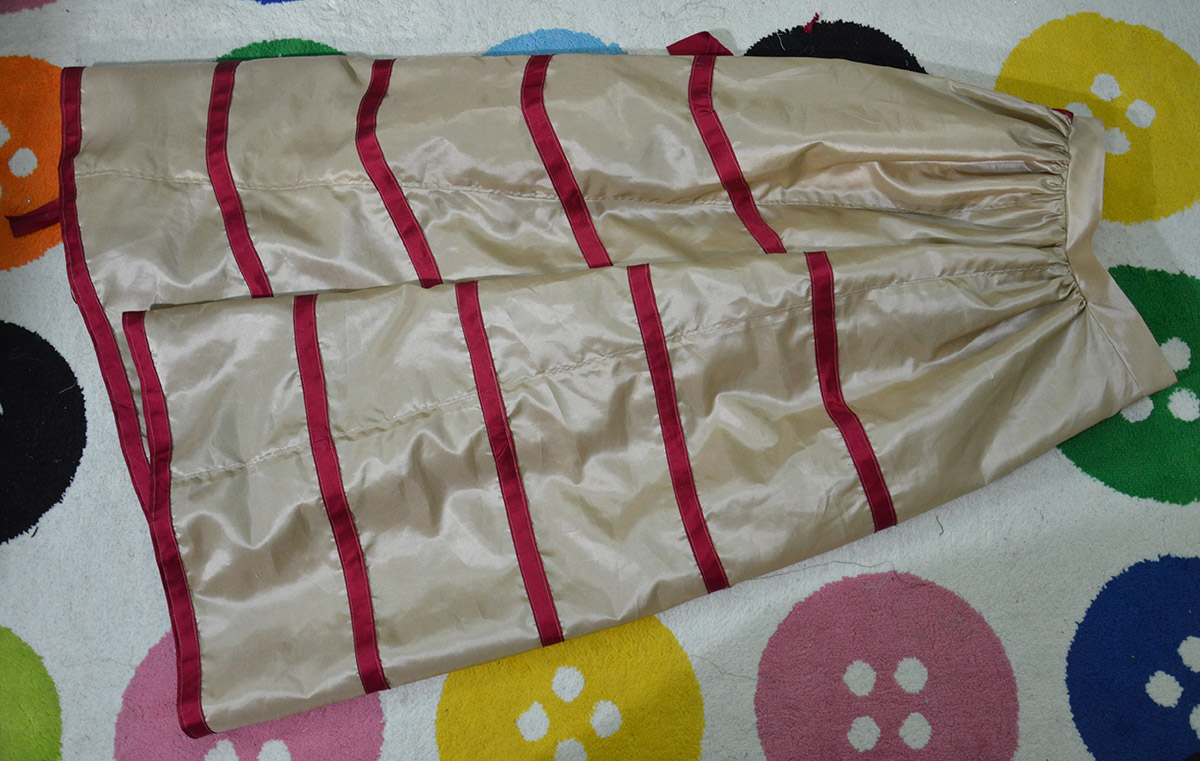
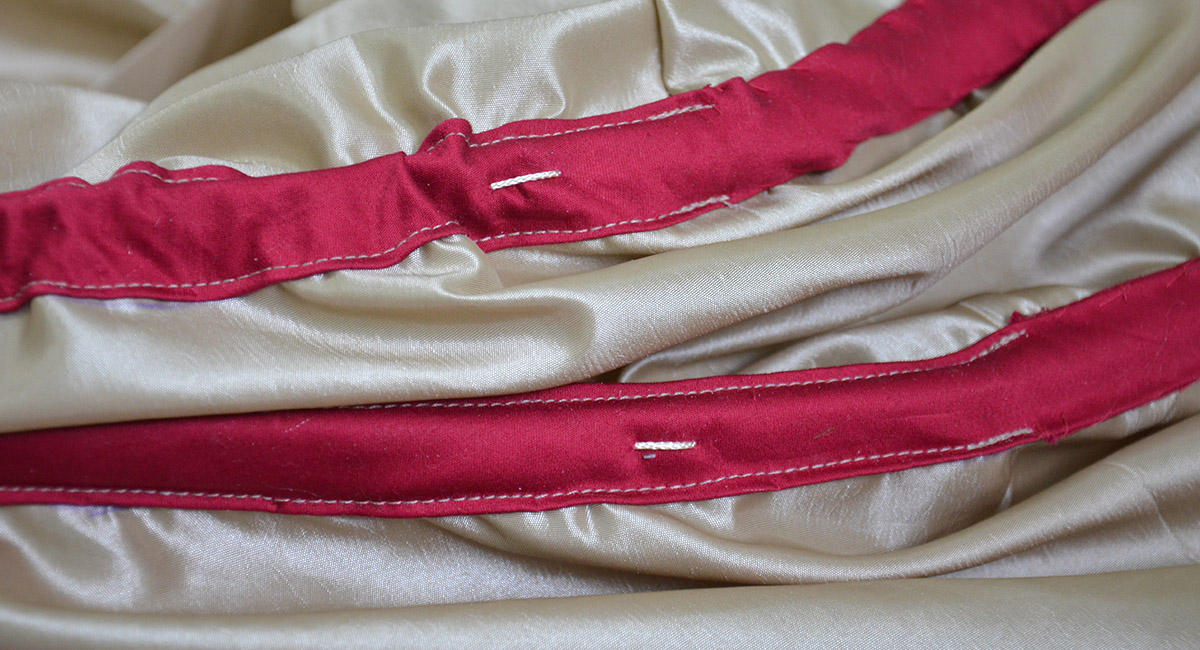
And then it was time for boning channels! I chose to make my own from cotton sateen, which will be bad in the long run since cotton sateen can stretch. But so far it’s been a couple weeks and I haven’t noticed any stretching, so hopefully this will be okay for a while longer!
I cut strips that were a little less than two inches wide and turned the edges inward – the same method you use for making bias tape!

I used chalk to mark the lines where the channels would go. The lines were drawn seven inches apart so there ends up being a little more than six inches between each bone. This is far apart by farthingale standards, but i’m tall, so I think it was a good decision.
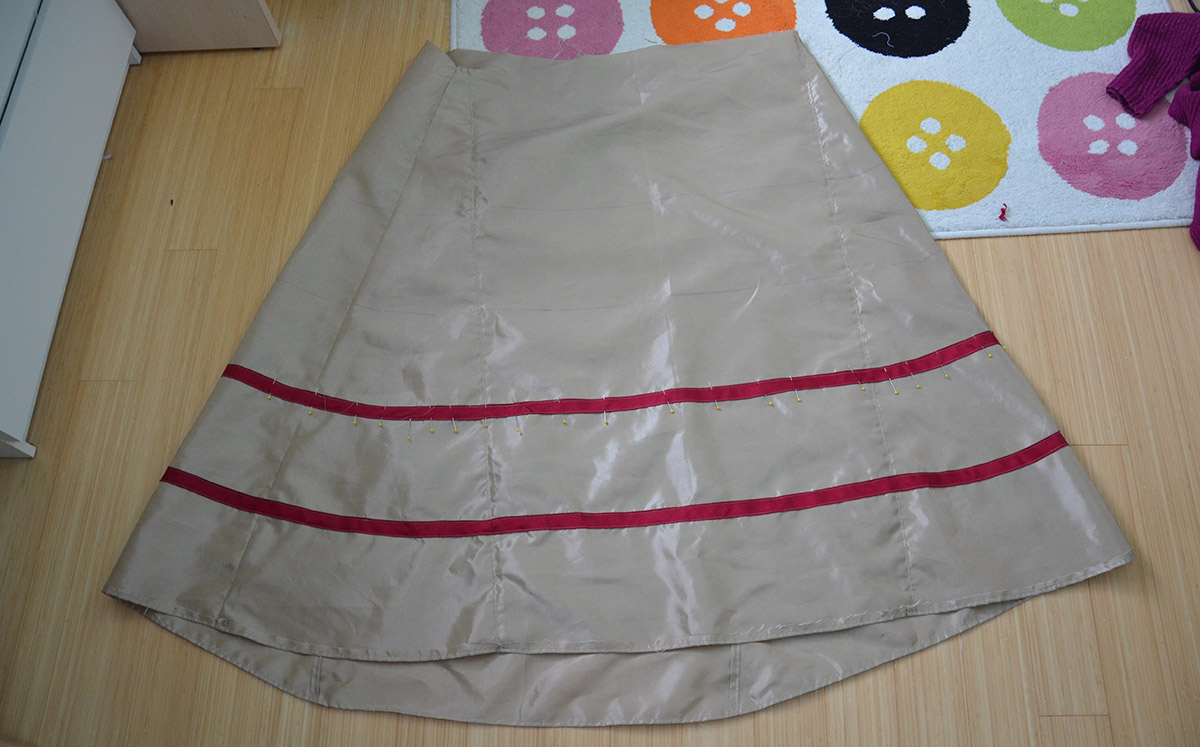
Each channel got pinned on and stitched down one at a time. I made the bright decision to wear shorts while working on this and my legs were a scratched up mess after – it’s such a big skirt and the dozens of pins make it deadly.
(Not really, but it’s close.)
Here is what it looked like with all the boning channels sewn! They are actually pretty sloppily done. I injured a toe on my right foot a day before starting this project which left me unable to use the pedal. I ended up controlling the pedal with my left foot and I don’t have nearly the speed control, so it was kind of a disaster!

With the channels done I turned to figuring out the closure. Since my bodies close up the back I decided to do the same with the farthingale. I regret this since I later wanted to add a bum pad, which is difficult to do with a back closure. A front closure would have been much better in my situation but oh well, you live and learn!
I slashed the back open and sewed bias tape onto the opening, then stitched the end up in a tapered seam.
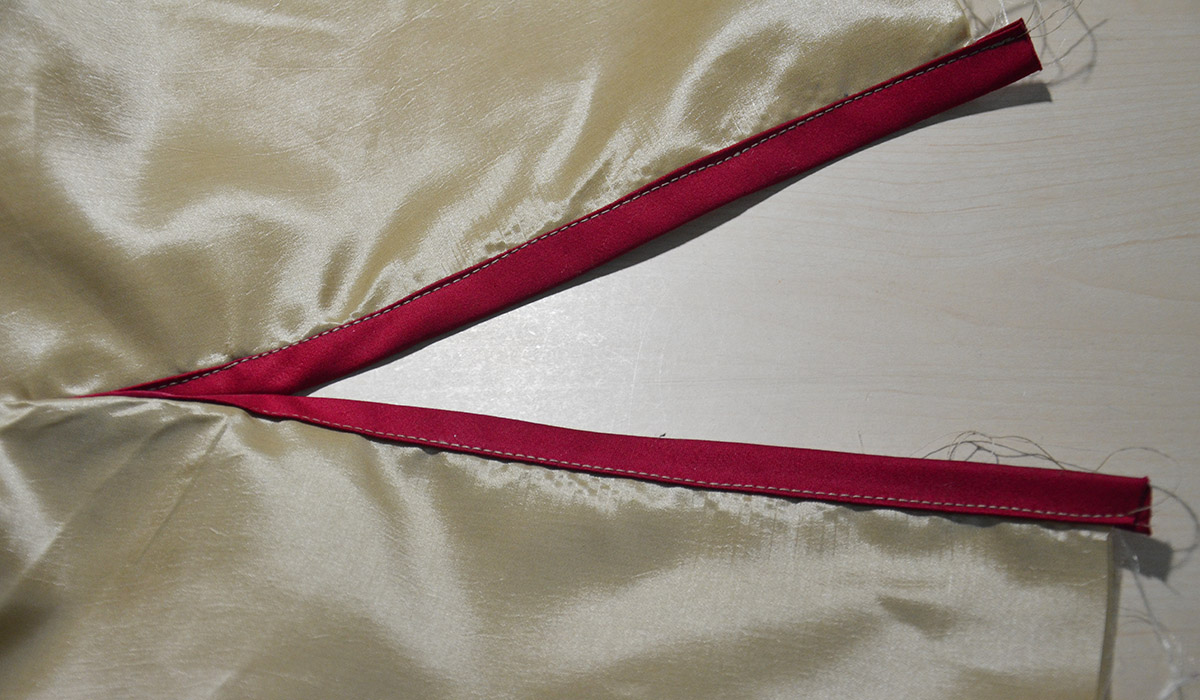
I made a waistband too, it’s two inches wide and made from leftover taffeta. The taffeta was stiff enough that I didn’t choose to use interfacing or anything.

I gathered the top of the skirt and stitched into onto the waistband. The seam was a mess so I encased it in matching bias tape.
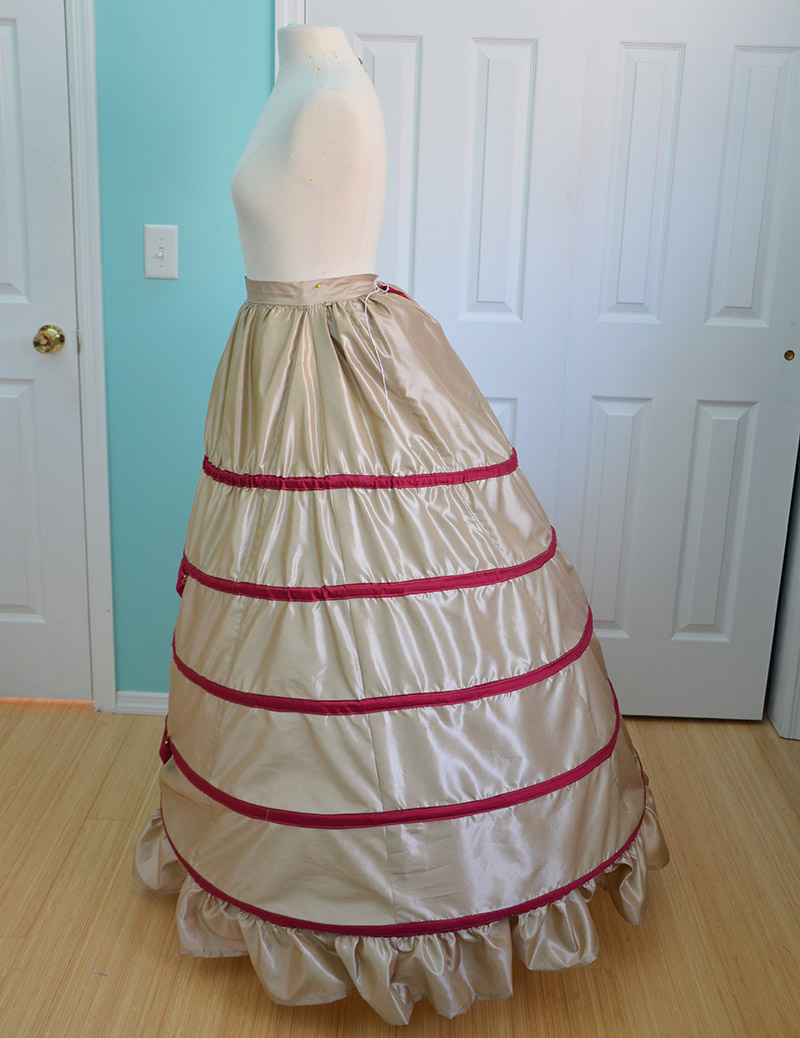
Now it was time to try it on the dress form – without boning it looked really sad!

Unfortunately with boning it looked even worse. I measured the boning channels and cut my hooping wire to be the same length. I tipped the wire with tape and threaded them through the channels.
I didn’t get the desired effect. Instead I ended up with this can shaped disaster.

I removed several inches from the top three bones and ended up with much better results. The silhouette was surprisingly good but from the front it had a terrible shape – almost like a “C”. It was very narrow and not as wide as it needed to be.

The bottom hoop didn’t sit evenly either…it’s was kind of a mess! I fiddled a lot more with the hoop sizes but ultimately decided regathering the top would help with the shape and fix the narrow front.
Which it did, the front looked way better. But with the newly added gathers to the front the farthingale tipped forward which is the exact opposite of what I wanted.
Luckily someone very clever on tumblr suggested weighting the front, which was brilliant! Now the hoop is flat but wide at the front and slopes down and out at the back. Perfect.
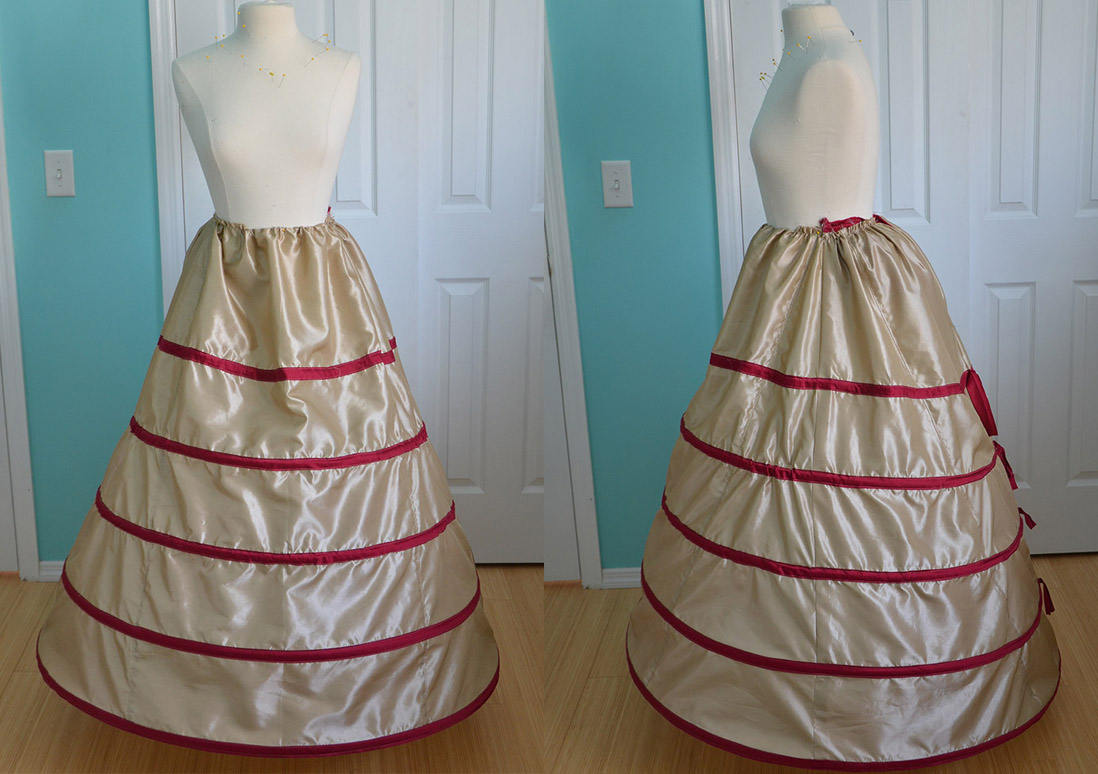
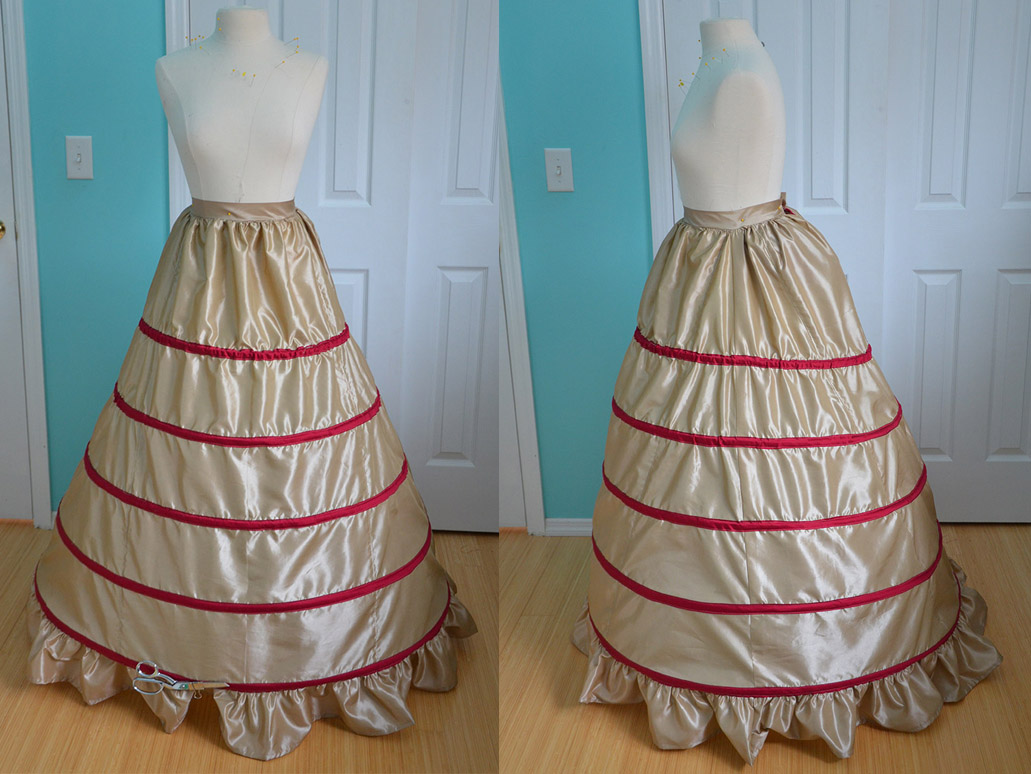
Since I was finally happy with the shape I moved on to the finishings. The waistband got reattached and I made a six inch ruffle from leftover taffeta with hopes it would fix the length problem.

They definitely helped, but the ruffle doesn’t hold it’s shape the way hooping wire does. So the skirt will have a slight tendency to cave in at the bottom which is frustrating.
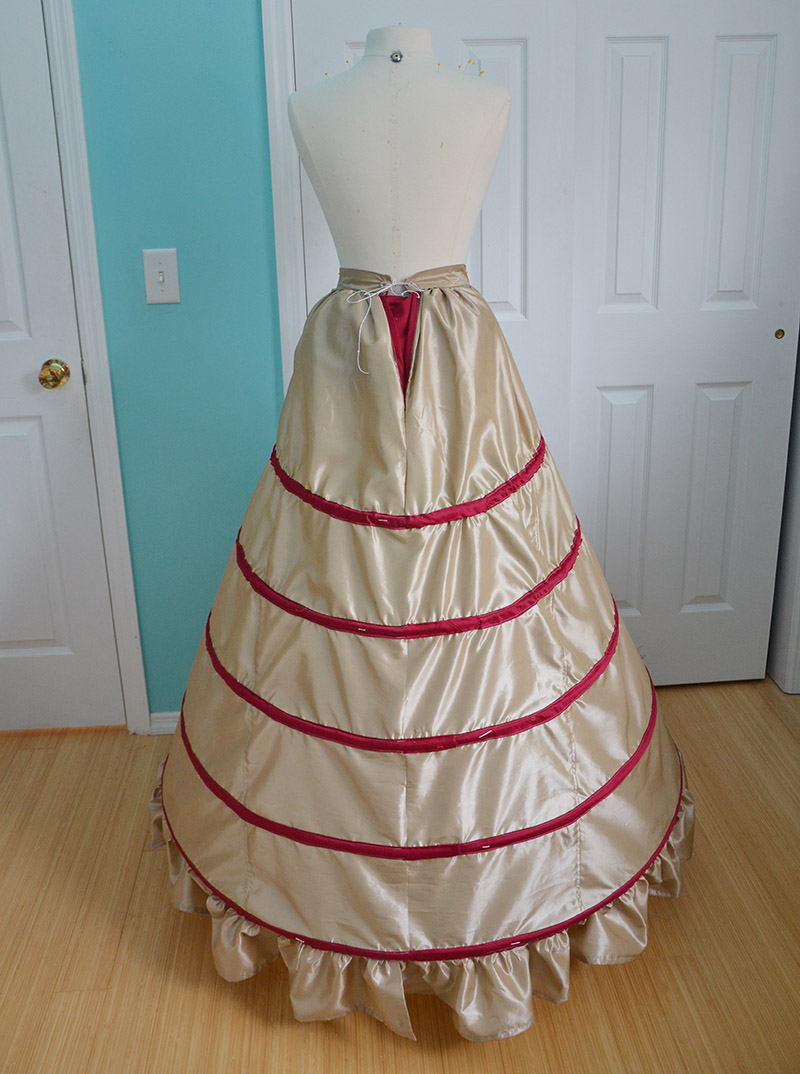
I used scissors and a binder clip as a stand in weight since I didn’t have a proper one haha.
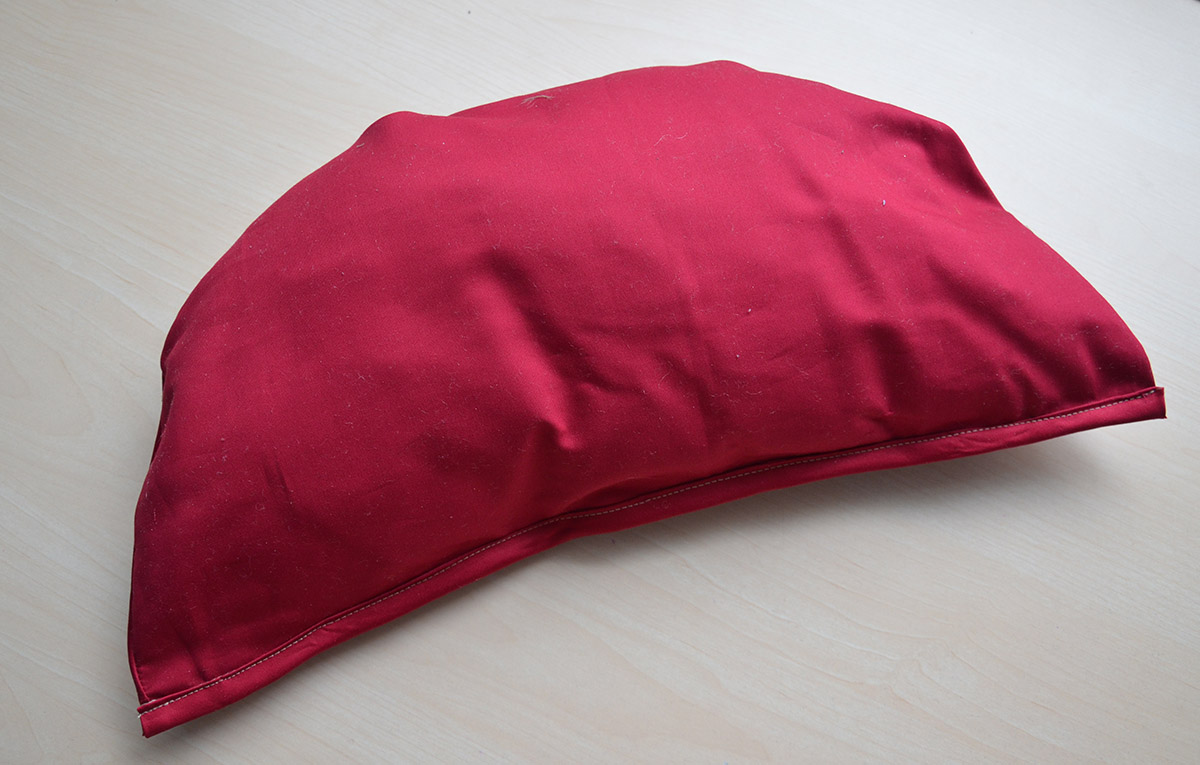
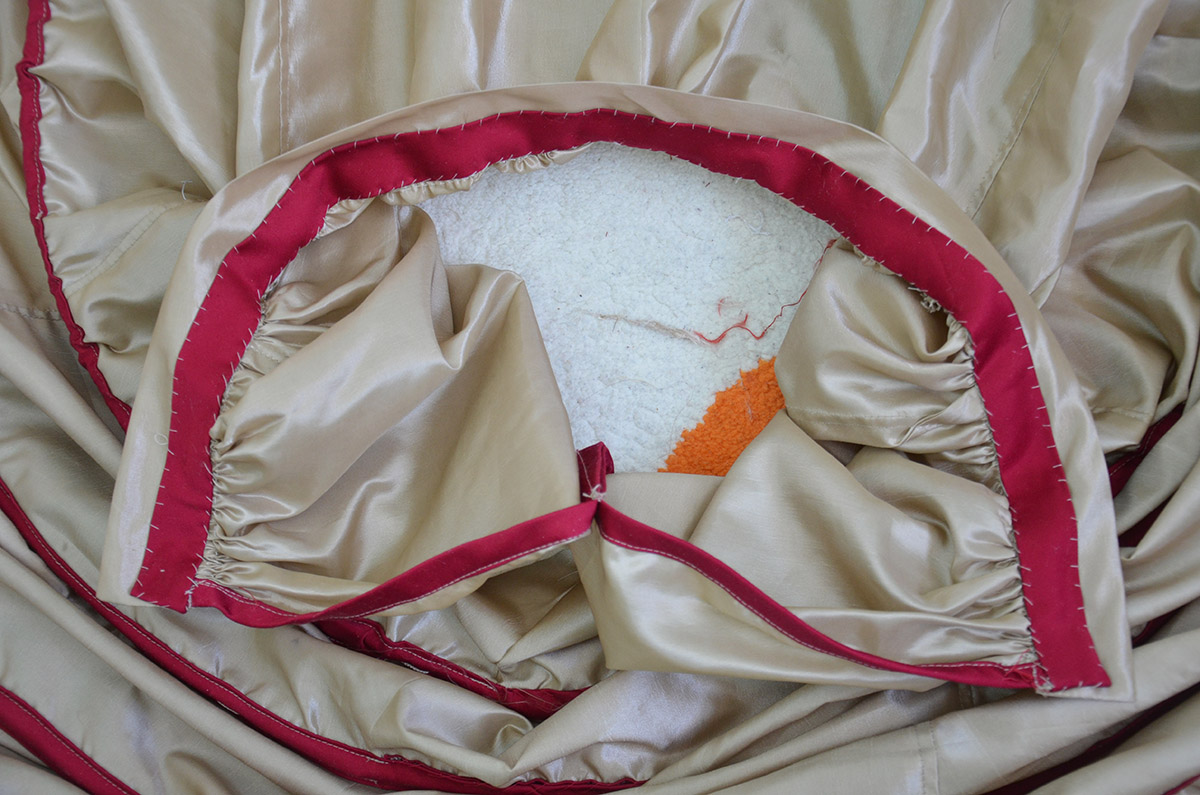
I also made a bum pad – which was on my dress form for all the above pictures. This is supposed to help tip the skirt backward but I don’t think it helped that much.
I made it from cotton sateen and stuffed it with quilt batting scraps. The edge was finished with bias tape and two snaps to attach it to the farthingale.
I secured the hooping in place (to make sure they don’t shift too much) by stitching through them with cord. The cord knots on the interior of the farthingale. This only works with hooping wire that’s pressed between layers of buckram, since you can stitch through buckram.
I also finished the interior of the waistband with bias tape, since I didn’t do that after regathering the top.
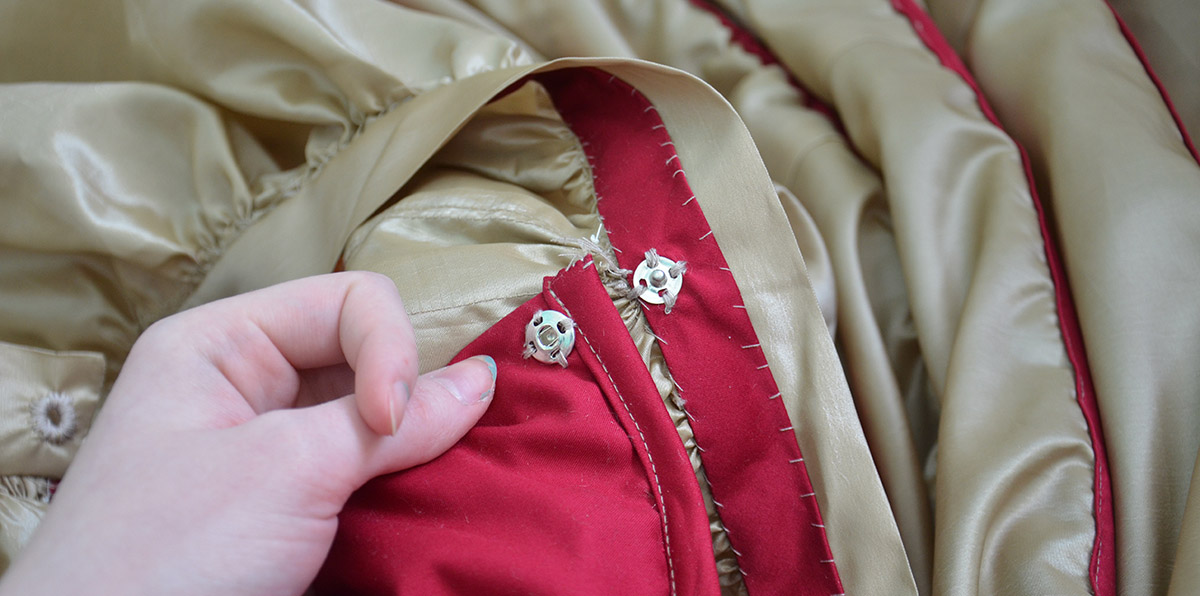
And l I stitched on two snaps to secure the bum pad. Not very pretty stitching on any of this – I was kind of over the project at this point.
The main closure for the farthingale are two eyelets. Once those were sewn it was officially done!

I ended up creating pockets out of cotton sateen for the weights, I stuffed one with metal cameo frames from an old costume and the other is a heavy as hell spool of beading wire. Not the most professional solution!
Both pouches are sewn into the interior center front. I have one on the second hoop and another on the fourth hoop to get the desired effect. This picture was taken before I sewed them to the inside.
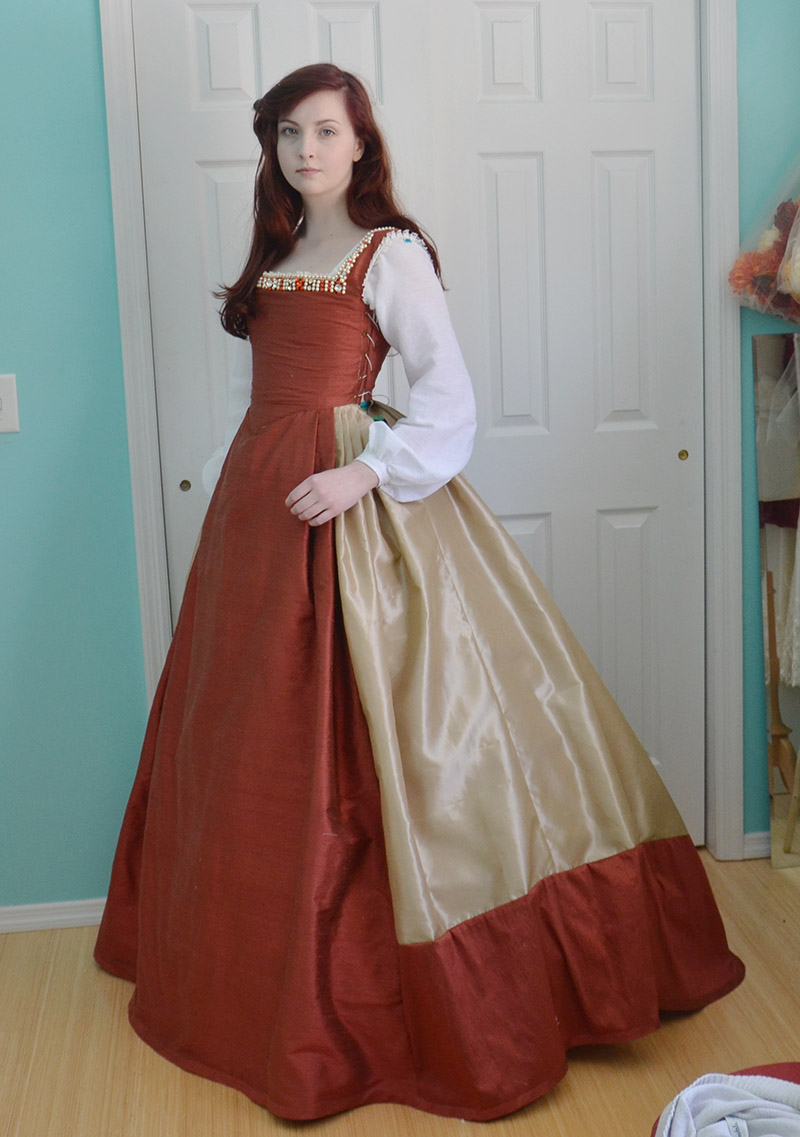
I was worried this would make the front too flat, but I actually really like how it looks with my kirtle over it! I can also remove one of the weights later on to soften the shape.
here it is being worn over a chemise.

And this is it paired with my pair of bodies and kirtle. The kirtle was drafted to fit over the unweighted farthingale, so the skirt hangs a little long in the front and a little short in the sides. But i’m not too bothered by that – i’m honestly just happy the shape looks good!
What a project – lots of frustrations and I felt like it was going to end in failure. But it actually turned out pretty okay! I think I would like to make another farthingale someday. Now that I have a good idea of the shape I like and how to construct one. I think making another one would be much faster, easier, and yield better results.
Thanks for reading! And I hope you are all enjoying the holiday, or at the very least having a nice weekend!

I can understand what you mean about the shape so early from your pictures, but I think you ended up with something really great. Looks like it was a frustrating adventure but a success because in the farthingale with the kirtle over-top it looks really pretty, and historically accurate too.
Thank you! Weighting the front ended up being the key to the shape, without that I think the finished product would be very different and not in a good way.
Very informative! I really admire the way you plow on through the mistakes that are a part of drafting and sewing.
Haha, I probably seem a bit more determined in blog posts than I do in real life. Major problems I run into lead to long breaks and hours of procrastination before I force myself to fix them – but hey, that’s all part of the process right?
Thank you for the kind words!
Making farthingales is my least favourite job.
I get rid of the ruffle, not only is it not period, but you will probably find you’ll stand on it and trip as it makes the farthingale too long- they should be ankle length for good reason
Really? I liked all the steps of making it (Simple pattern, straight seams, and top stitching) it was just the struggle to get the shape right that bothered me. I could see them being fun to make if you knew what you were doing…but maybe not!
I originally added the ruffle because the kirtle was caving in at the bottom which looked really crappy. The tutorial I followed to make the farthingale says it should be two inches above the ground at the front and three inches above the ground at the back, and mine is pretty close to that with the ruffle on.
In my mind being accurate is great, but if it the finished product looks terrible than accuracy doesn’t really matter. I’d personally rather have my kirtle look good and have an inaccurate ruffle, but I really appreciate the input! If I do trip over it i’ll at the very least shorten it but it hasn’t been a problem so far.
You look so beautiful in the last picture. >///<
I understand the difficulty. Underskirt are trouble ^^ But you did a beautiful job. The result is a full success and the gown is fabulous like that ^^
I totally get the using-stuff-that’s-laying-around-for-weights thing. Bravo! In the future, if you’re looking for good weights, you might try large washers from the hardware store. They’re flat, heavy, and have a convenient hole in the middle. 🙂
Don’t think I mentioned before, but I *love* *love* *love* the color of that kirtle. Such a gorgeous fabric.
Thank you for the suggestion! That sounds really clever. I might have to use that idea. I’m glad you like it! I love the color too, which is weird since I dislike orange. There is something about the sheen to it that gets me.
You have no idea how much I appreciate your work you’re such an inspiration 🙂 btw you really remind me of Constance from BBC’s The Musketeers in the last photo (the costumes there are AMAZING you should check it out for inspiration)
Thank you so much! I haven’t even heard of it before, but i’ll have to check it out. One of my biggest costume inspirations is the filk “The Three Musketeers” 2011 film, so that bodes well for it.