It has taken me longer than expected to write this, but I finally have the last “Making of” post about my orange 1890’s dress to share!
Part one can be seen here and shows the making of the bodice. Part two is posted here and focuses on the sleeves. This post will be about the skirt and some of the finishing details. I didn’t take a lot of photos of these steps but hopefully I took enough for it to make sense!
…
Since I was unhappy with my previous 1890’s skirt attempt I decided to use a pattern for this one. I once again referenced 59 Authentic Turn-of-the-Century Fashion Patterns *, using the pattern from one of the ladies street costumes. Of course I altered it to match my measurements, but the shaping of the pieces is the same.
Here is the finished pattern. The side and back pieces were both cut out twice and the front panel (the narrowest one) was cut on a folded edge of the material.

After cutting it out from the material I assembled the pieces with french seams and roughly pinned them onto my dress form.
I was originally a bit disappointed by the slim silhouette since SO much fabric went into this skirt, but I liked the shape enough to stick with it.

I turned the top few inches of the back edge inward twice, so the raw edge was hidden. Then I sewed the edge down. I left this portion of the skirt open and sewed the rest of the back seam normally.

Then I gathered the back of the skirt by hand.

The silhouette looked a bit fuller after this, which I was happy with. However I was not happy with the length of this skirt, it’s a whole inch shorter than I had envisioned. There was no room to do the pretty hem I wanted.
To make things even more annoying, the back was too long and had to be cut down.

I had to scrap my ideas for a one inch rolled hem and chose to face the hem with some suiting instead. I sewed this on with a quarter inch seam allowance to keep the hem as long as I could.
I don’t think this was a bad idea, but I should have used a lighter (or stiffer) fabric. This one didn’t iron smoothly and the hem ended up looking puckered even though I was very careful when sewing it. It bothers me to the point that I plan on redoing it soon, which is pretty drastic for me!

After hemming the skirt I sewed loops and buttons onto the top portion of the back seam to keep the opening I left closed. I’m not sure where my pictures of that went, but the process was identical to adding buttons and loops to the sleeves.
Then I sewed the bodice onto the skirt with the wrong sides facing each other, so the raw edges are on the outside.

I covered the raw edges with a waistband that has a pleat running horizontally across it to add interest. It was originally supposed to be gathered but that didn’t look very nice so I pleated it instead!

The final touch was adding a matching modesty panel to the back to hide the foundation garments that were peeking out from the loops the last time I tried it on.
This is just a rectangle with the edges whip stitched inward, then it was whip stitched to the lining.

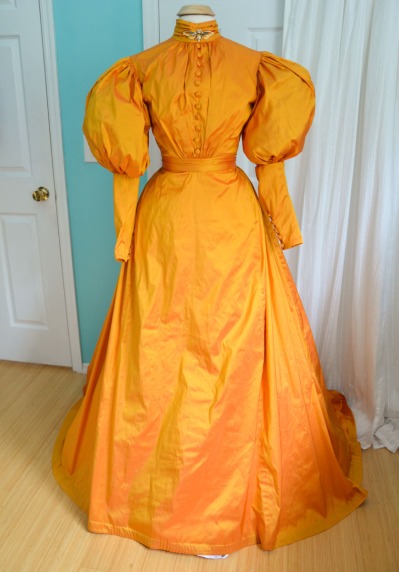
And that was it! Here is the back all done up. Not historically accurate, but I love the buttons and how far down they extend.

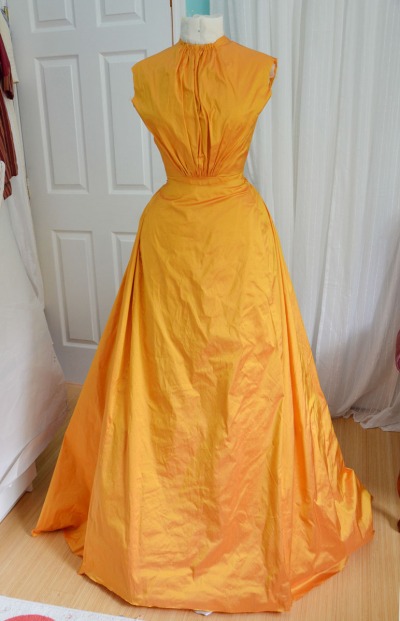
Here is the front.

A close up of the brooch~

And pictures of it on the dress form – keep in mind that it doesn’t really fit my dress form, the silhouette is a lot more dramatic when I wear it over a corset.
There is also a bit of petticoat peeking out since the hem was shorter than I had planned. Even though I was annoyed by this, it was kind of a blessing in disguise since it forced me to shorten my petticoats which were all way too long.
Overall I really like this dress. I’m so happy with the fit, and how light it is. The fabric is beautiful and was wonderful to work with – even though the color isn’t my favorite, I like how striking it is. And the button details make me so happy.
The only thing I don’t like is the hem, but I’m confident that can be fixed.


With the dress discussion done, it’s time to talk about the hat! I’m not the biggest fan of hats from the 1890’s since I feel like they are out of proportion with the full sleeves. I looked through a lot of references and couldn’t find anything inspiring (except for the ones with birds on them…but one bird hat is enough for me, or at least for this year).
At least until I came across this fashion plate – I’m not sure where this is from or if it was even drawn in the 1890’s, but I love how different it is. It’s like a twentieth century bicorne.
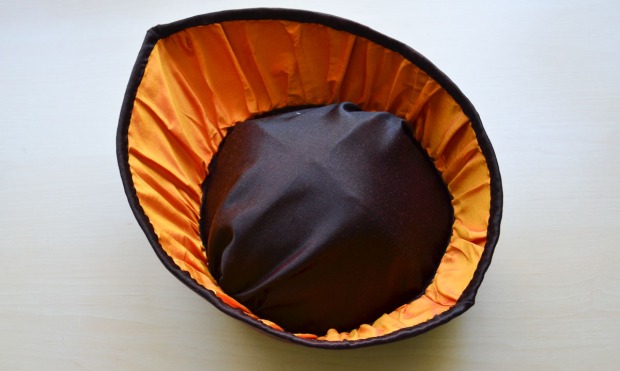
I made the base from interfacing.

I bound the seams by hand, then sewed wire into the edges.

I made a cap from interfacing too. The cap was covered with brown silk and lined with cotton, then sewn to the brim.

The brim is covered with brown silk as well, and lined with some leftover orange material.
For decoration I used a peach ostrich feather across the top.
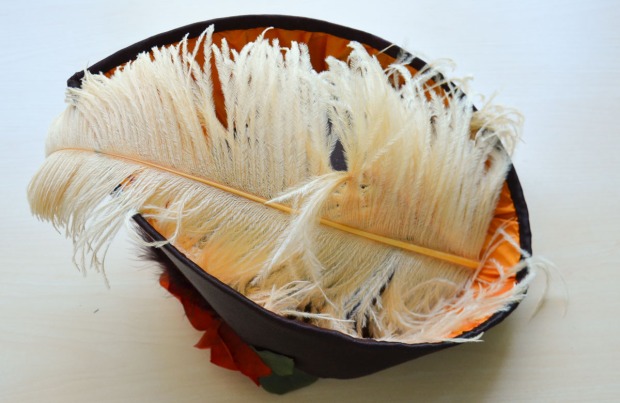
And the side is decorated with fake roses, leaves, and some small brown feathers.

It can be worn in a variety of ways – with the feather facing the front, or either side. I ended up wearing it like this and pinning a comb into the cap to keep it in place.
And speaking of hats, I wanted to take a minute to mention the video I made about all my hats. It shows them in detail, along with how they look worn and a bit about the construction process/period they come from. If you like hats, you might enjoy it! It can be watched here.

And I think that’s it for this post! The dress is done, the hat is done, and so are all the things that go underneath them. I’ve already photographed this project (in its natural habitat, a pumpkin patch) and as soon as I get done editing I will post them too!
Thanks for reading!

The dress turning out beautiful! I can’t imagine the insane work at such volume of sunshine fabric. You did a magnificent job!
You do such wonderful work. I don’t know if there are many people that realize just what it takes to sew together simple t-shirt… So knowing that there is someone like you,…one of few and far between that understand the TRUE art that dressmaking…is refreshing!!!
Stunning work! Can’t wait to see you model it.
I love this! It looks like something straight out of Crimson Peak! Orange is one of my favorite colors and this fabric is the perfect shade…plus, your beautiful brooch really adds to the neo-gothic romance feel. The shorter hem is perfect for showing off some fancy opera boots! 🙂
i love that you call this dress the pumpkin dress. Such a gorgeous creation from such an unusual color. If you are interested finding new patterns – consider here: http://reconstructinghistory.com/. It’s a friend’s business – granted – one that is obsessed with authenticity. But Kass herself is a spectacular resource.
You are so incredibly talented. The color on this dress is so vibrant! I love it!
I know you mentioned that you don’t like the way the hem turned out, but I thought it actually looks lovely, the slightly puckered texture works well in the pictures and actually looks intentional. The whole dress is beautiful!