For my second post of the day, I have something completely different, but with a similar Halloween inspiration.
And much like my robe a la polonaise, this dress is also made from a Wilmington “Gone Batty” fabric. Except for this piece, I bought the black and white stripe print fabric. Fifteen yards of it, to be exact.
I didn’t use any references for this project, I just had an idea in mind and I wanted to make it a reality. And that idea evolved and changed as I worked on the project. I didn’t take a lot of photos while constructing this, since it came together very quickly. But I’ll do my best to explain my thought process.

The project is made from three pieces – a skirt, dress, and hat. It’s worn over a 1881 style false rump made from dense rows of cotton organdy, and a corset made following a pattern in Norah Waugh’s “Corsets and Crinolines”.
I had the foundations done ahead of time, so the first piece I started making for this project was the skirt.
I was originally going to make the skirt entirely out of vertically cut strips of the striped fabric. But when I actually got to starting on it, that seemed awfully boring. So I ended up alternating strips that were cut horizontally and vertically for a more intricate effect.
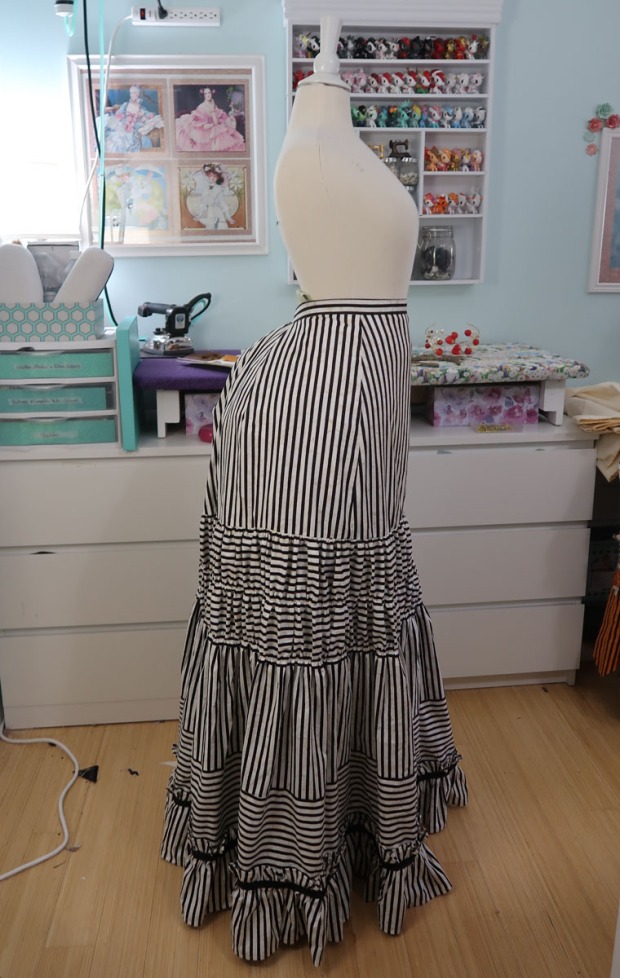
I draped the top panels to fit nicely over the false rump, so they taper in towards the waist and have some shaping to them. The rest of the skirt is made from rectangles that were seamed together and gathered down.
It kind of does wonky things to your eyes when you look at it. But I think that’s part of its charm.

I had three design ideas I wanted to incorporate into the dress:
- I wanted it to button down the entire front.
- I didn’t want it to have a waist seam – the bodice and skirt would be continuous from shoulder to hem.
- The skirt would be bustled with glittery skeleton hands.
Easy enough right? I also had a sketch to work off of, but the finished dress doesn’t really resemble it.
I usually don’t bother draping skirts since they are somewhat simplistic in shape and require a ton of fabric. But since this was a new era and silhouette for me, I thought it was important to drape it and do a full mockup.
Here is my first mockup fitting.


A few tweaks hat to be made but I was pleasantly surprised with the shape and fit! I also played around with bustling the back while featuring glittery skeleton hands.

And then I made the dress. Yeah, I wasn’t kidding when I said I was bad about photographing the construction process.
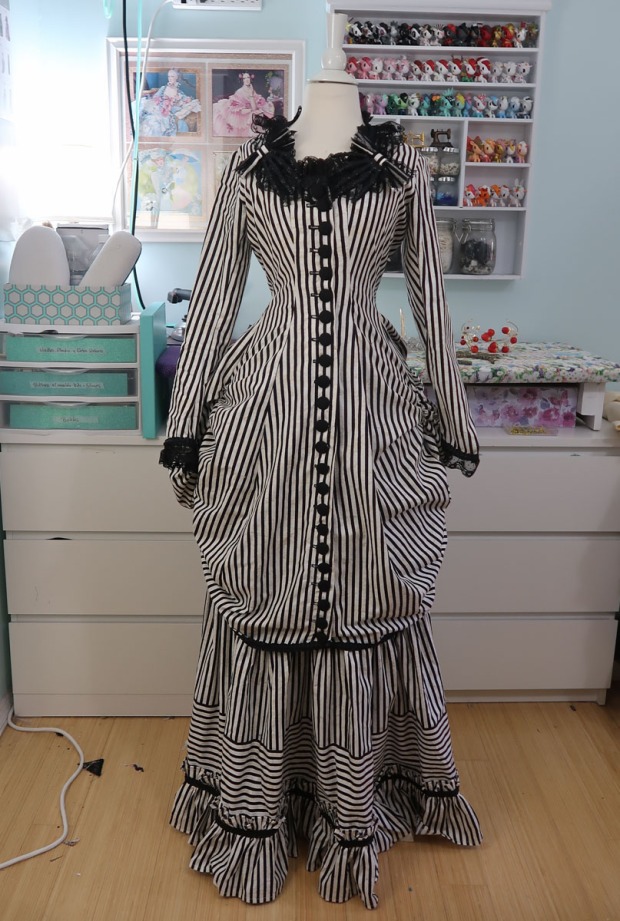

The dress was actually very simple to construct once I had it drafted. It was assembled completely by machine. And the hem of each panel was turned outward and covered with pleated satin trim from my stash, which was also sewn on by machine.
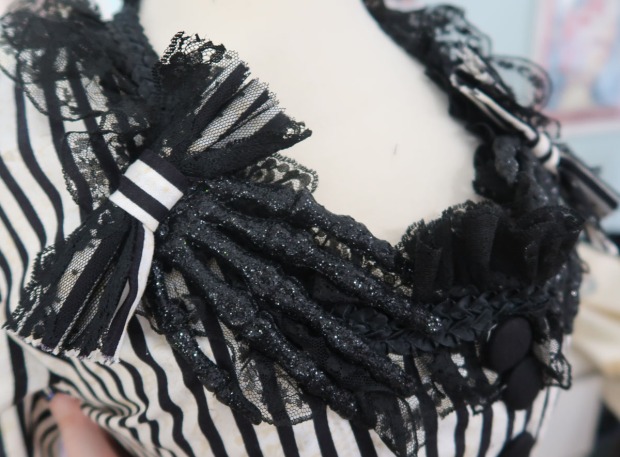
I didn’t stitch down the seam allowance, or add boning or a waist stay like 1880s dresses traditionally had. Nor did I bother with lining. The neckline is finished with a facing and that’s about it. The inner edge of the facing isn’t even tacked down – all that secures it is some lace trim which was (shocker) also sewn on by machine.

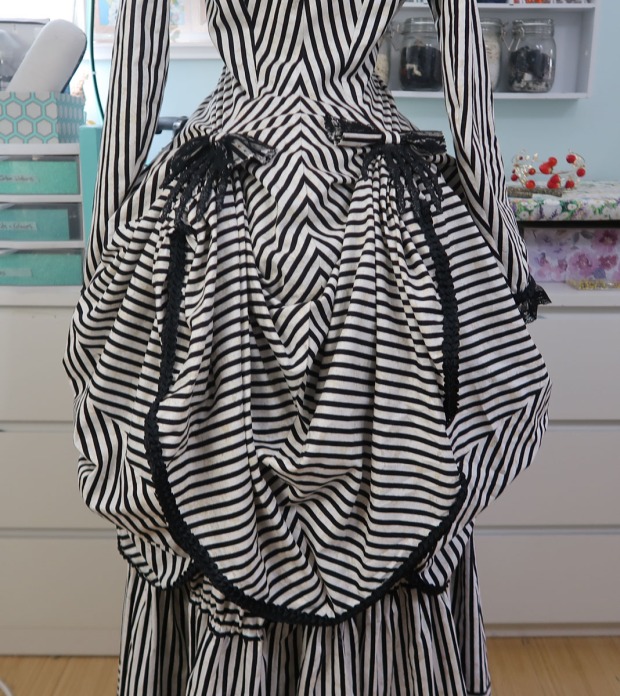
The only hand sewing involved was stitching on all the buttons, and securing skeleton hands to the front of the bodice. It kind of looks like they are cupping the chest, which I think is hilarious.
I used bows sewn from striped fabric and matching lace trim to cover the end of the hands, and make them a bit cuter.
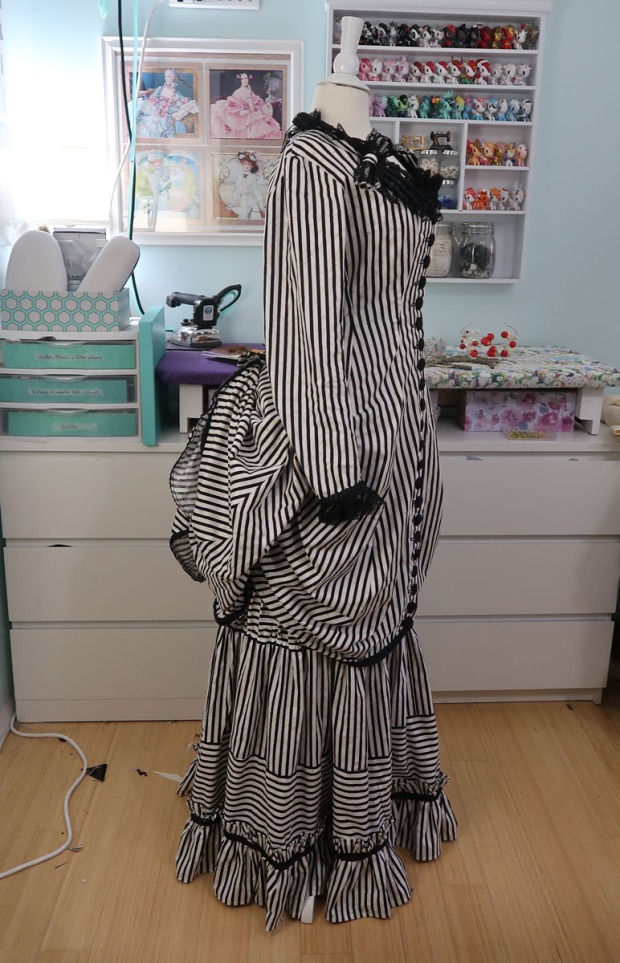
The same method was used on the back of the skirt, where there are more hands. Except these are positioned to look like they are gathering the fabric that shapes the dress.


The actual shaping of the dress comes from gathers sewn before seaming the pieces together. Along with a carefully placed tacking stitch and twill tape ties.

All of that is hidden by another draped panel.
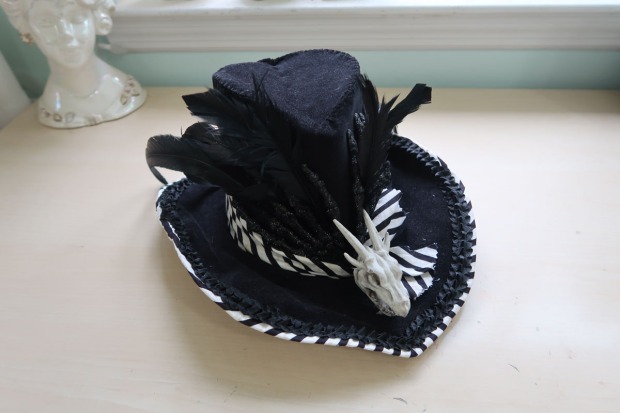
And that’s the dress! It was paired with a hat I made from interfacing and corduroy, with matching lining.
The construction of this is pretty on par with the dress…and by that I mean, it’s pretty crap. But looks decent from the outside.
I was so frustrated the day I worked on it, I didn’t even have the patience to pin the wire in place before sewing it on….which led to me breaking four needles whilst constructing it. Yeah. Don’t sew when agitated, it can be dangerous!
It’s trimmed with some dyed goose feathers, more skeleton hands, and a fake dragon skull I bought at Michaels. The glittery hands came from Michaels too, they were in the floral decor section – originally attached to sticks and meant to be part of Halloween bouquets! But I think my usage of them is superior.
The shoes were from American Duchess, simple black pumps called “Tissot” and appropriate for the era.

And here it is all finished!
Compared to my Robe a la Polonaise which had so much hand work invested in the construction process, this is practically a pile of garbage. But I think I like it just as much as the polonaise, just for completely different reasons.
I’m a big believe in that things don’t have to be perfect to be worth making, or worth appreciating.
And even if you’re capable of superior construction, sometimes it’s nice to focus more on the the creative and artistic aspect of sewing, rather than what the inside of a garment looks like.
Sort of like how an artist might slave over a painting for months, that they are really proud of. But also bang out a beautiful sketch in ten minutes. Both can be appreciated even if the quality (and quantity) of work put into them is very different. Who’s to say that can’t be the case with historical costumes too? Or at least that’s my justification for it!
I think this is one of the most visually striking things I’ve made in a long time, if not ever. And I’m proud of it because of that. I hope you like it too – though I’m sorry about the lack of progress shots!


Thanks for reading! I hope you have a wonderful Halloween (or just a wonderful day, if you don’t celebrate) and hopefully I’ll be back with another post sometime soon!

Beautiful and inspiring! What does the pleated false rump look like? I will be working on something similar and would love to have a look if you wouldn’t mind!
Two winners in one day. Very nice.
Love it!
I hope you’re able to go back and create a pattern for this to sell to McCalls for next year. Only one request – please draft it for plus sizes (24 and higher) too!
I love getting an email with your latest news. Thank you!
This is so fantastic! 😍😍
How lovely!
Love it!!! ❤️❤️
Very dramatic it suits this time of year!!
Keep on keeping on!!😈😈❤️
It’s kinda like “Blue Poles” by Pollock. It was originally called “Number 11, 1952” because he didn’t consider it a serious piece, it was just playing with paint. I’m not saying that this will be one of your most influential works, of course! But if it is, you’ll be standing with giants.
Excellently disturbing, as is proper for the season. ^_^
You Should be proud – it is fantastic. I like the use of the stripe as the binding on your hat. It really completes the outfit. (You’re never fully dressed without a hat!)
I am, as always, impressed with your creativity and sewing talents. I love both of your new Halloween dresses-this striped one and the polinaise. I am looking forward to seeing your future projects. Congratulations on your success!
Dear Angela,
I just wanted to say thank you for your new blogposts and just all the beautiful work you do in general 🙂 You have inspired and encouraged me so much on my “sewing jurney”… I admire your patience and your love for tiny details so much and it’s because of you that I bother finishing edges nicely or sewing stuff by hand. I wish all the best for you
Both Halloween dresses are striking, but I think I like this stripy one best. And yes, you should not feel ashamed for not putting the same effort in one garment as another. They are each their own expression. I think people forget that true progression is not linear. It is a waltz of 2 steps backward and one step sideways.
Lovely silhouette! I hope you do more dresses from this era — you rocked it!
Love the way these are photographed in such a dramatic style. The visual jumpiness of the stripes surrounded by the deep black makes your wonderful work even more amazing looking. Beautiful and lyric.
Both your Halloween dresses are bonkers and I love them both. You have a lot of talent and it’s so fun to see it in play. ❤
I adore this outfit!
And I’m so happy that you found time to post on the blog again.
This dress is truly amazing and one of my favourites!
This outfit is gorgeous!