This is another project that came out of nowhere. I was about to go to bed and thought “I should make a dress based off that painting pinned on pinterest a few months ago”. I wrote the idea down so I wouldn’t forget in the morning, and seventy two hours later I had a dress!
This dress is actually an ensemble that consists of a kirtle, undershirt, hat, and eyepatch – that last one might sound a little odd, but it will make sense in a minute. I based this costume off of this painting, it isn’t the most exciting painting or costume but I thought it was very striking when I first saw it, and it’s obviously stuck with me. The subject of that painting is Ana de Mendoza who was a countess, duchess, princess, and prisoner at various points of her life. She wore an eyepatch after an injury left her blind in one eye (she may have lost the eye as well – sources disagree).
She has far more elaborate costumes shown in other paintings, but I decided on this one. I love the hat, the color scheme, and the simplicity to it. Plus I could make it (almost) entirely out of things I already owned, the only thing I had to buy were materials (interfacing, denim, and feathers) for the hat!
…
Today I’ll be showing how I made the most major piece of this costume (but not the most striking – i’d say that award goes to the hat) which is the kirtle. I made this from six yards of polyester taffeta which I got in NYC at the beginning of last year. It was four dollars a yard and is dark grey in color.
I decided to make this kirtle the “proper” way with stiffening in the bodice. My last kirtle (made for my tudor project) didn’t have any structure, instead it was worn over a pair of bodies. That led to problems later on and I didn’t want to make the same mistake this time!
I used an altered version of Norah Waugh’s bodies pattern. I made the basque waist wider and shorter, lowered the neckline, lengthened the straps, and took it in slightly. I cut the altered pattern out from canvas, which will be the base layer of the bodice.
I marked out all the boning channels and backed the fabric with cotton. Then I stitched all the channels and filled them with quarter inch wide plastic boning.
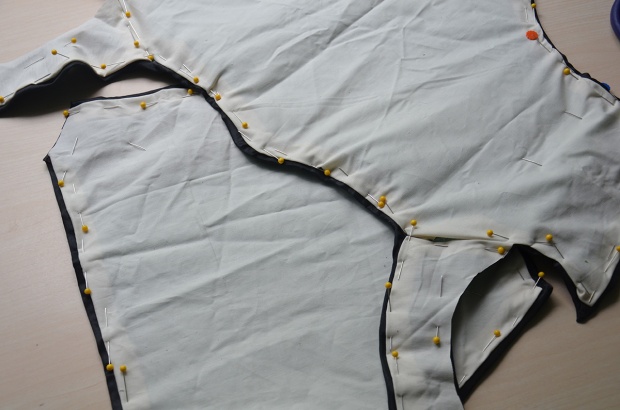
I pinned taffeta over both pieces. The curves got clipped and folded over the edges, then whip stitched down. This was really hard, taffeta does not have a lot of give to it and it did not want to go around those curves.
The interiors looked like this! The cotton layer was just to back the boning channels, so a lot of it got cut away to remove bulk.
Then I pinned a thin muslin layer to the interior, which will function as lining. I sewed this in with a whip stitch as well. But I used black thread for this, so it didn’t end up looking very pretty on the inside.
I decided I couldn’t stand how puckery the taffeta looked around the the arm holes, but at this point there was’t a lot I could do without ripping everything apart. So I cut strips of wool and sewed those over the arm holes. I think this looks quite nice, even though I doubt it’s historically accurate.
I also bound the pieces together instead of sewing them with seams. I did this because it worked better this the pattern and reduced bulk at the shoulder, which is always good!
I also started sewing the eyelets on the back side seam.
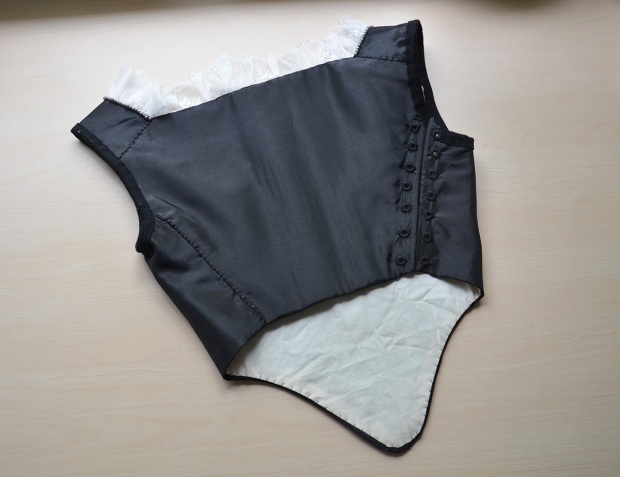
Here you can see the lining job I did (I told you it’s ugly) and how the bound edges look from the interior.
I stitched a gathered strip of lace around the neckline. Historically this would be attached to the chemise, but it’s such a pain to get the lace of an undershirt lined up with a boned bodice and I wanted to avoid the struggle. So I sewed it directly onto the bodice.
Then I added the pearls. These were once again, something I already had around. I bought these from my red and silver “Renaissance” gown (aka my totally un-researched slapped together costume that had a sleeve fall off during a photoshoot) but never used them. I sewed these around the shoulder of the bodice but didn’t put them on the back, since the wig would likely get tangled in them.
You can also see how my eyelets progressed!
For the center point, where the strands of pearls join, I put a brooch. I bought this for my birthday last year, It was a total $2.24 on ebay and suits this costume perfectly.
And when I say “perfectly” I mean it looks really pretty, not perfect from an accuracy standpoint.
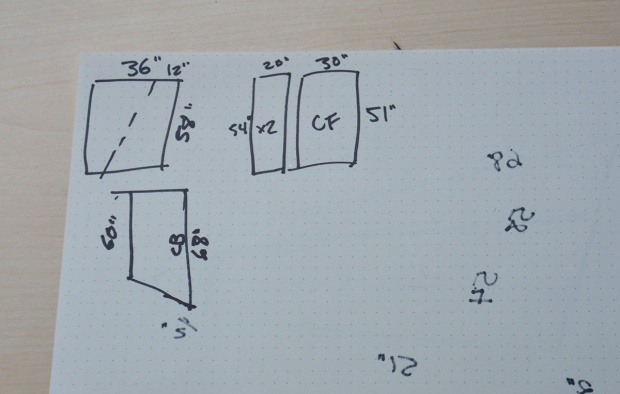
With that attached, the bodice was complete and it was time for the skirt! I actually made and cut this skirt out in the middle of the night, so my photos are lackluster at best and nonexistent at worst. But here is my skirt “pattern” there are six panels which get progressively longer towards the back. Once they were all cut out and sewn together I cut the hem into an arched shape instead of the blocky/triangular one this pattern creates.
Two of the panels cut out…
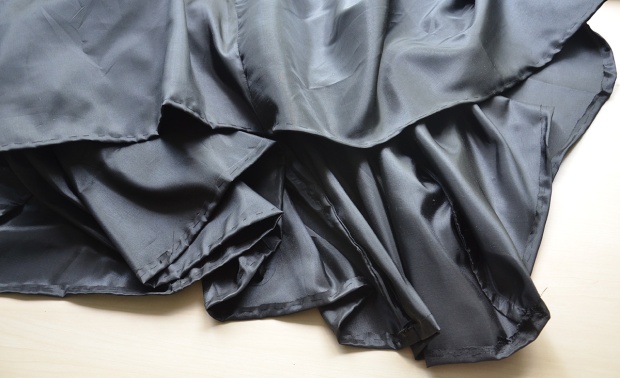
And those are all the photos I have of the skirt being cut out. I told you it was bad! But you can probably imagine the rest, they all got sewn together with the wrong sides facing each other, then the seams were trimmed down to a quarter inch and sewn into french seams.
After the hem was shaped I folded the edge over by a half inch and basted it down.
Then the hem was brought up by an inch and a half and pinned in place.
I sewed it down with a cross stitch.
I knife pleated the top of the skirt down to twenty five inches.
After I sewed across the pleats I pinned the skirt to the bodice. Then I cut a seven inch slit in the skirt, which continues down from the opening in the side back of the bodice. To finish the edge I used more strips of wool.
All that got sewn on, then I pinned a strip of one inch wide bias tape over the frayed edge on the interior of the bodice. I stitched that down and it was done!
Isn’t it pretty?
I’m very happy with it! I was going to wait until Friday to post worn photos but here is a sneaky one since i’m eager to share!
Thank you for reading!


Beautiful dress. Where do you shop for your fabrics.
Absolutely gorgeous design as usual. You are an amazingly talented person!
As a non-creative I am always enthralled by your creations. Evidently vivid colour is not necessary for a striking ensemble.
This one is beautiful. I love the contract in the colors.
You’ve done a fantastic job bringing Ana de Mendoza to life! And WOW that’s a lot of boning, the bodice looks great though so it’s working!
You look amazing! Have you ever thought about doing something like this:
http://www.gogmsite.net/russian-style-in-the-bustle/princess-dagmar-of-denmark-/dagmar-portrait.html#previous-photo
I just love the neckline of the dress!
Shes working on a 1860’s ball gown now!^^ you can see it on her tumblr!
Adorable!
another amazing project verry simple but soooooo chic.
Oh this is really striking! I like the simple elegance of it.
This dress is so gorgeous, I really love the brooch and the hat is really cute. I think it’s one of my favorite dress that you made.
So gorgeous!
This whole outfit is wonderful. I can totally picture a character with it.
This is so lovely! Could you do a post with what underpinnings you’re wearing under it? More specifically, I’d love to know how you got that skirt shape! Is that just a crinoline or is there some sort of bumroll?
This dress is absolutely amazing!
Love this ensemble it gives me an idea for a M’lady D’Winter costume.